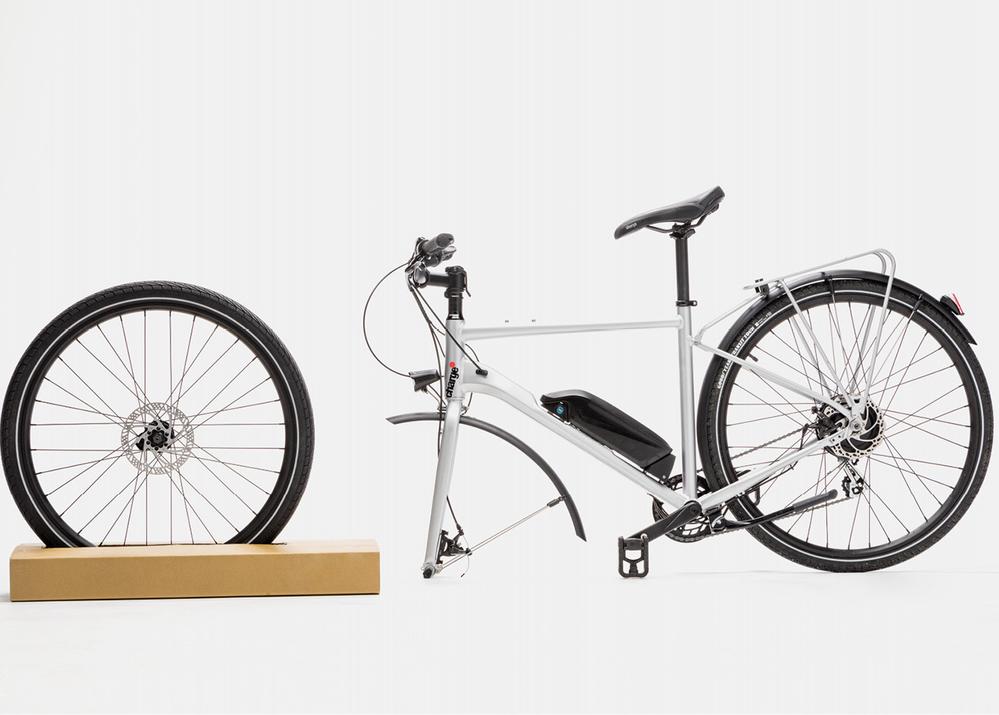
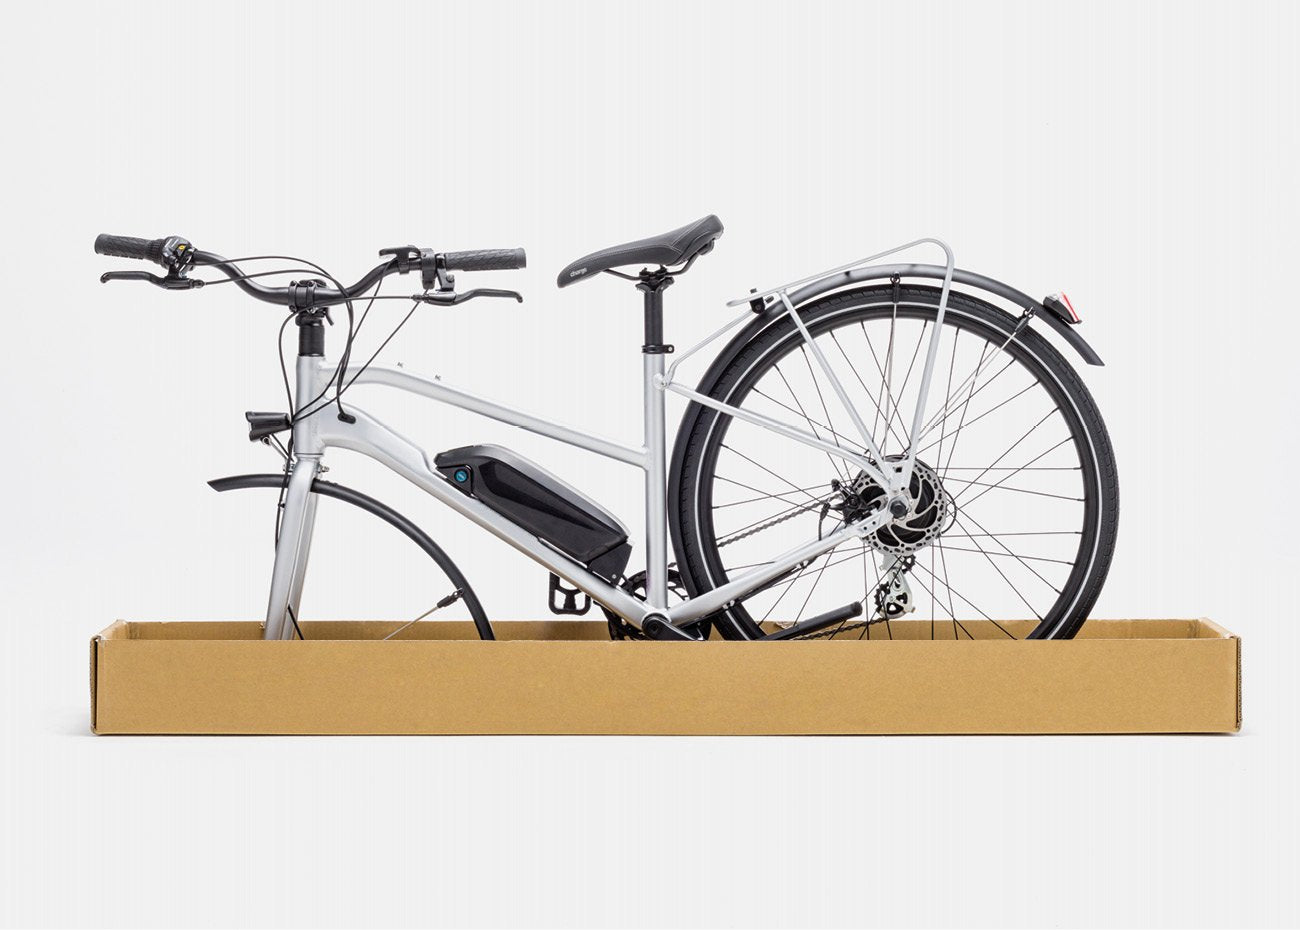
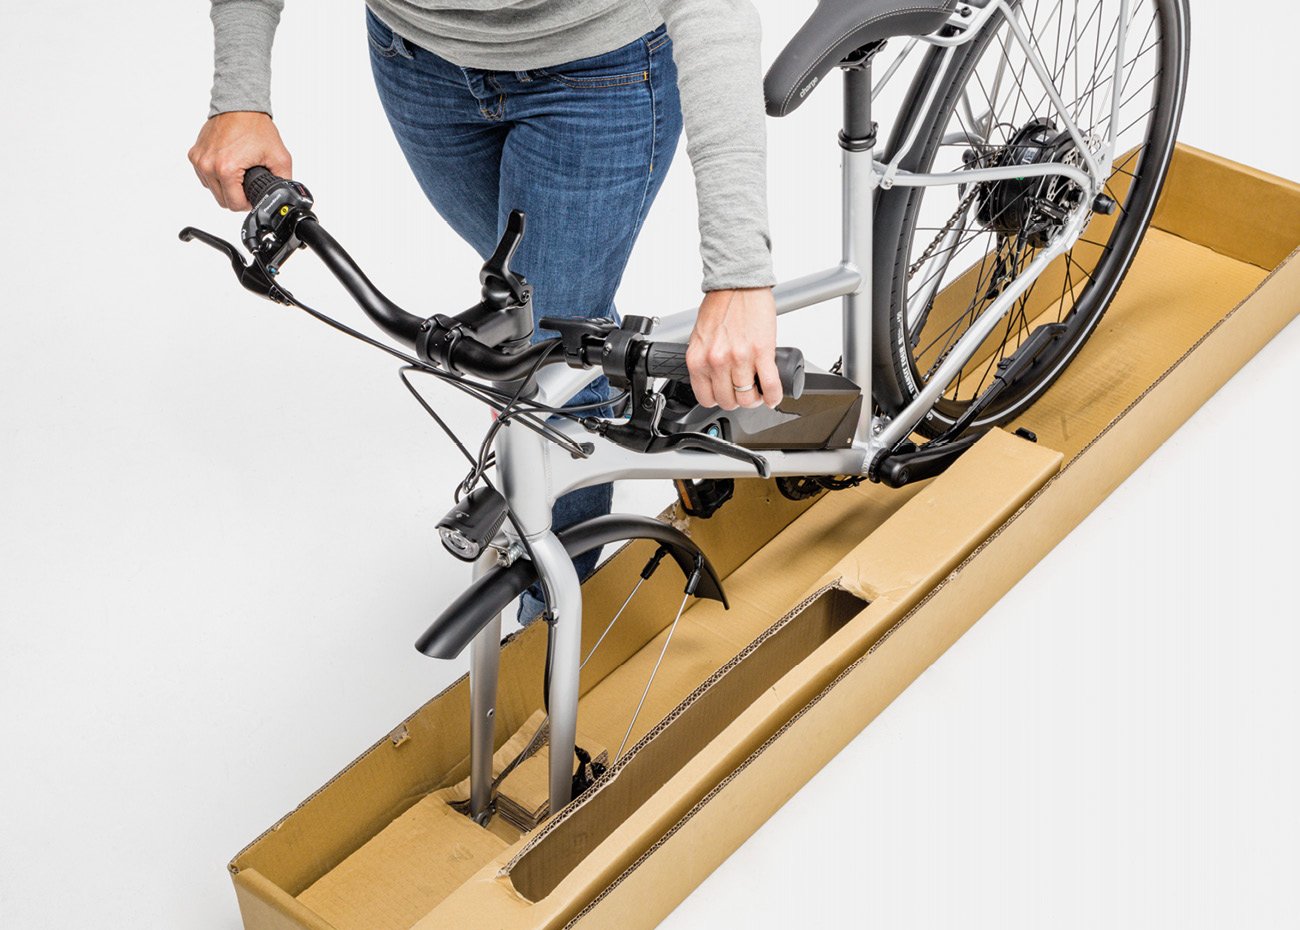
1. Remove the protective cardboard packaging that is on top of the bike and any that may be on the frame.
2. Remove the front wheel and set aside.
3. Leave bike in tray for now.
Your cart is looking a little empty. Check out our full line of electric bikes and accessories.
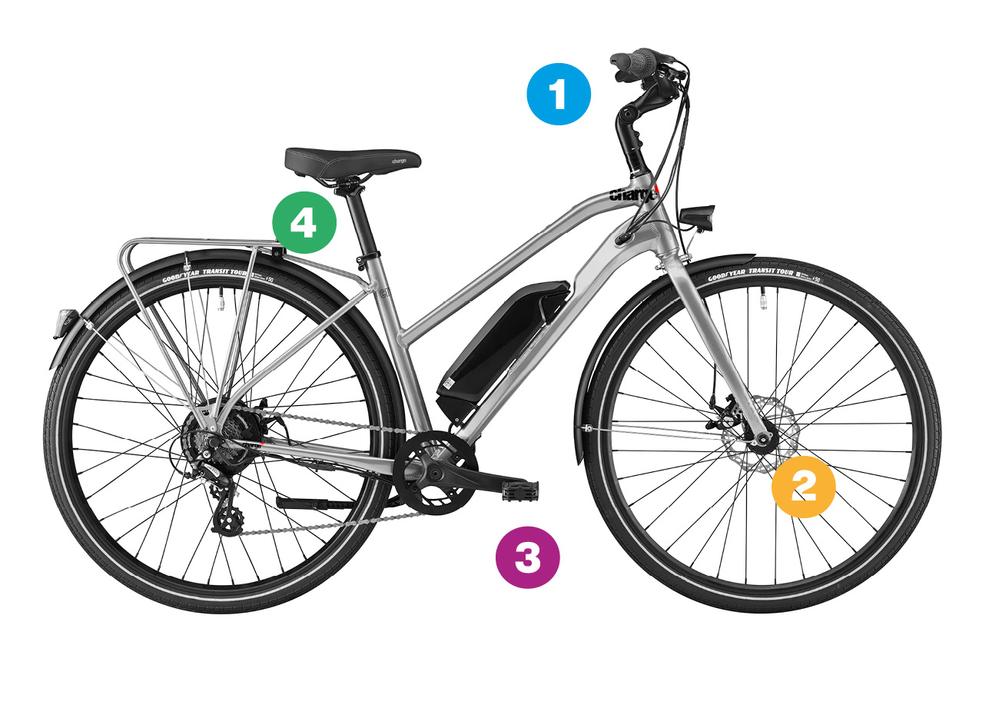
1. Adjust Handlebars

2. Install Front Wheel
3. Flip Down Pedals
4. Adjust Seat Height

1. Remove the protective cardboard packaging that is on top of the bike and any that may be on the frame.
2. Remove the front wheel and set aside.
3. Leave bike in tray for now.
4. Remove the red tie that holds the chain to the chainwheel.
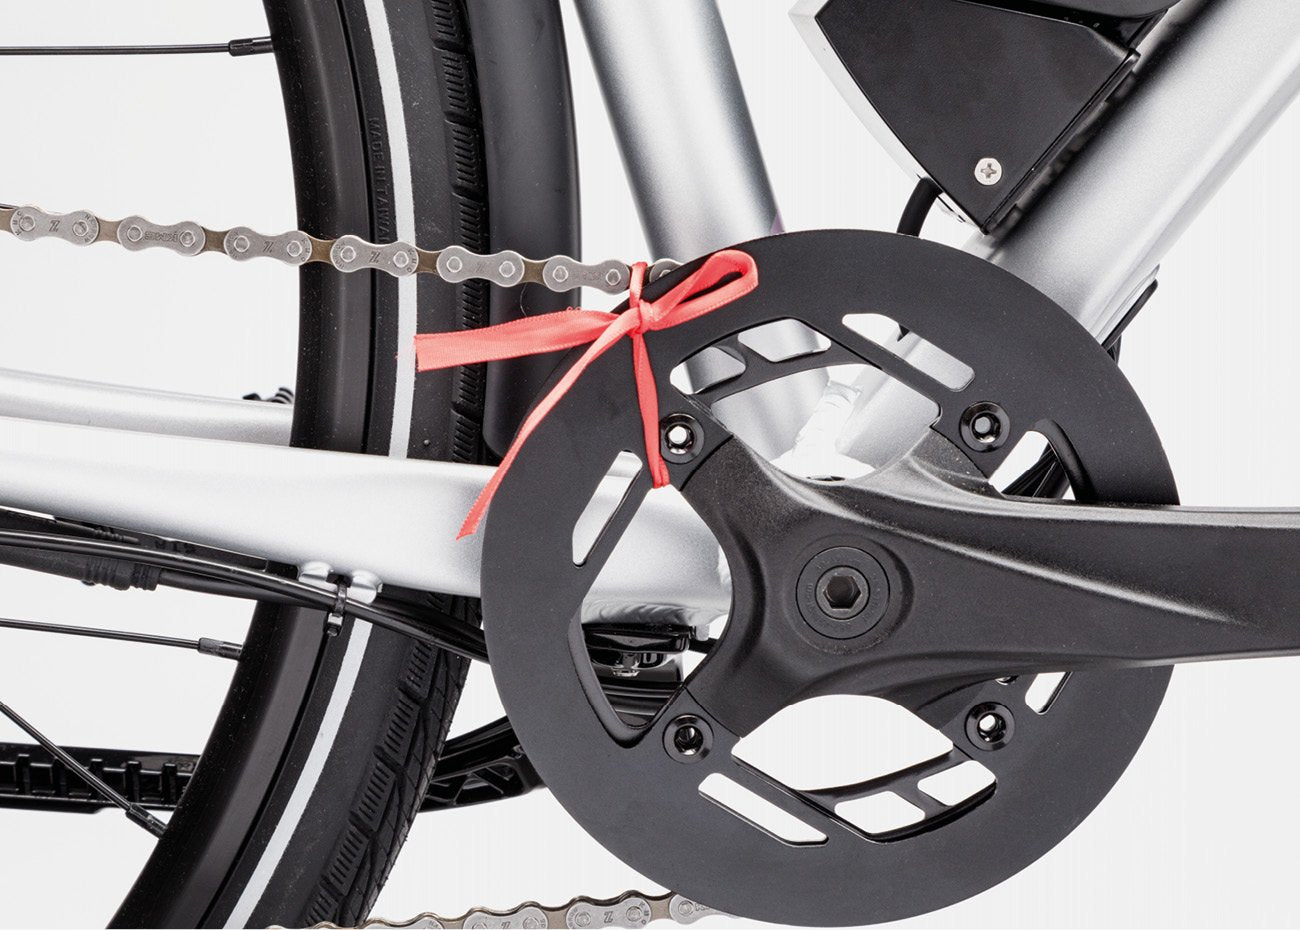
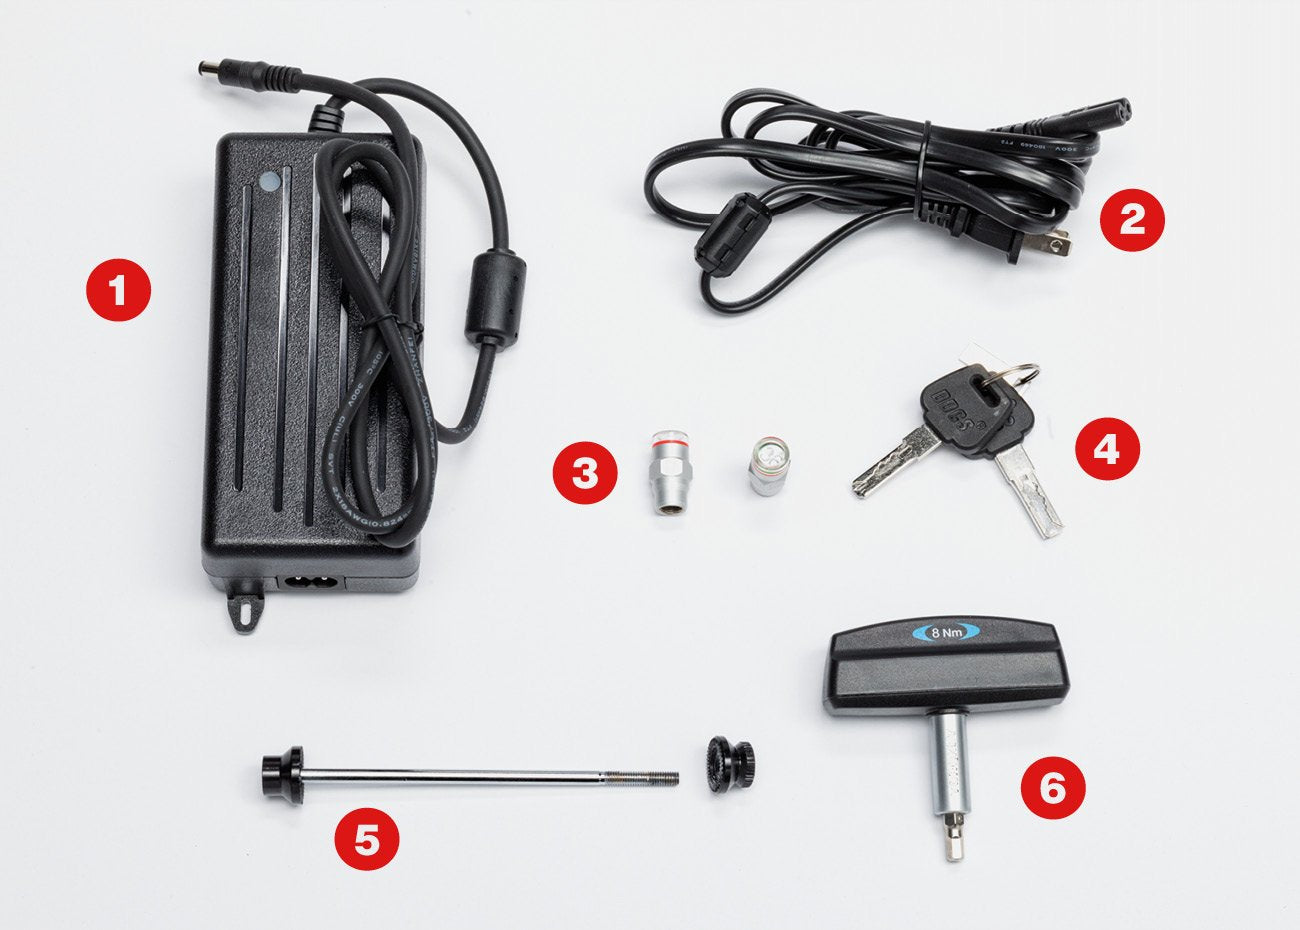
5. Open the parts box.
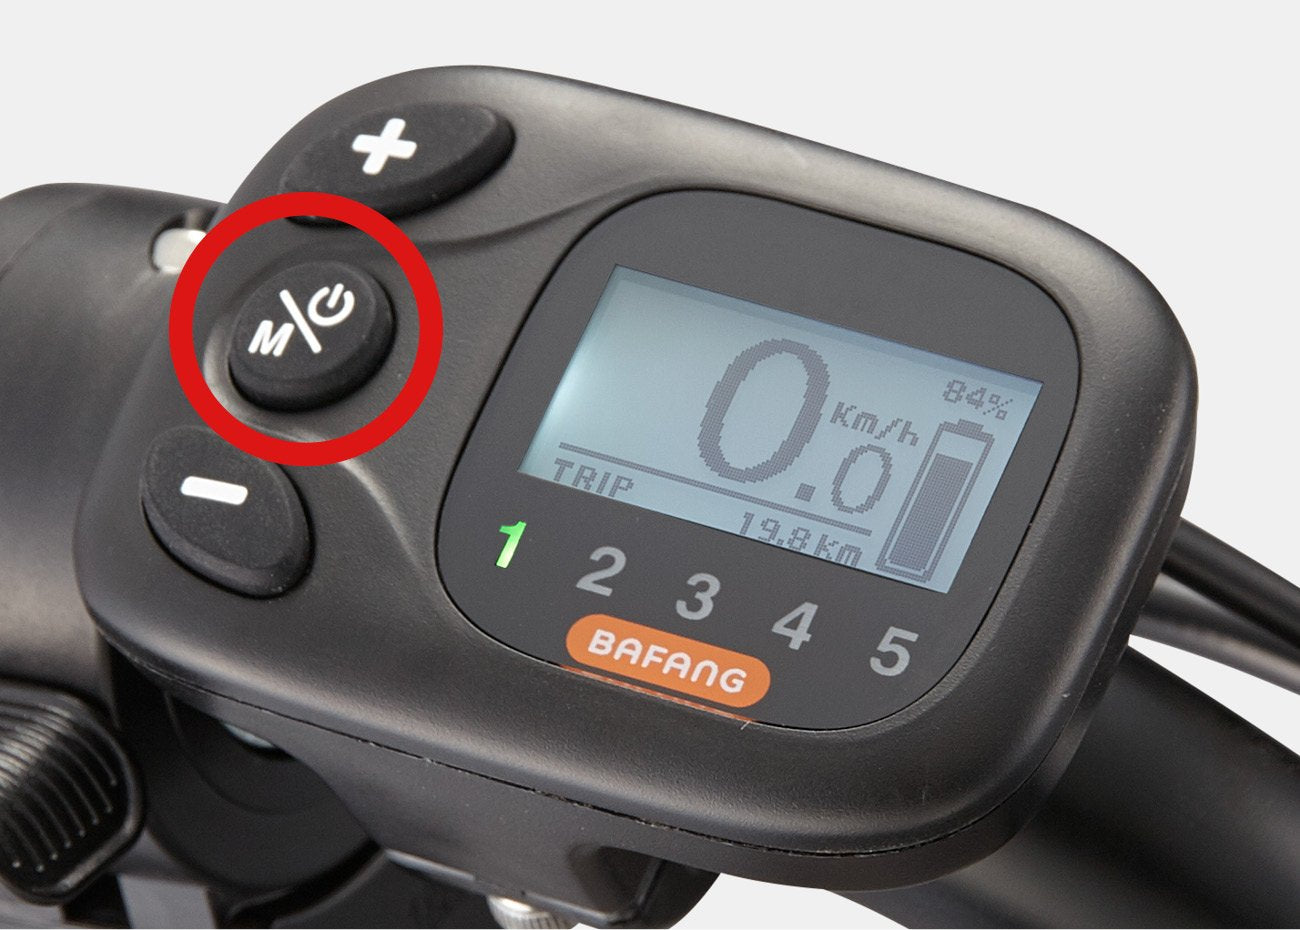
6. Ensure the power is OFF before continuing assembly by confirming the handlebar display is blank. If power is on, press and hold the power button until the display shuts off.

Power button
This step is particularly important to your safety. Please see the assembly video at help.chargebikes.com as well as ADJUSTMENT INSTRUCTIONS:
Adjustable Stem Instructions, in your Charge Bicycle Owner’s Manual.
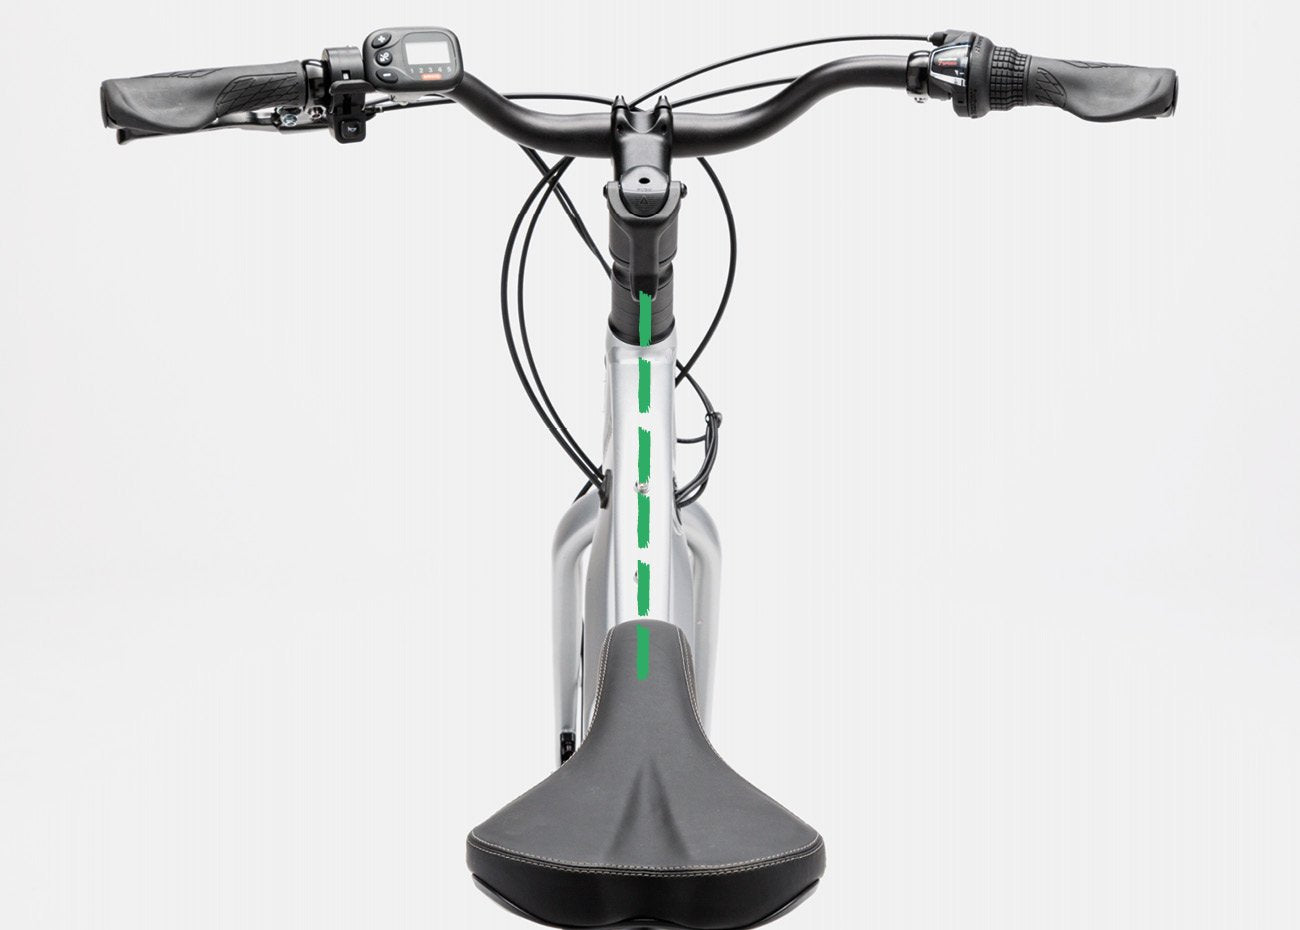
1. Locate the safety release button atop the handlebar stem. Using your thumb, slide the safety release button FORWARD.
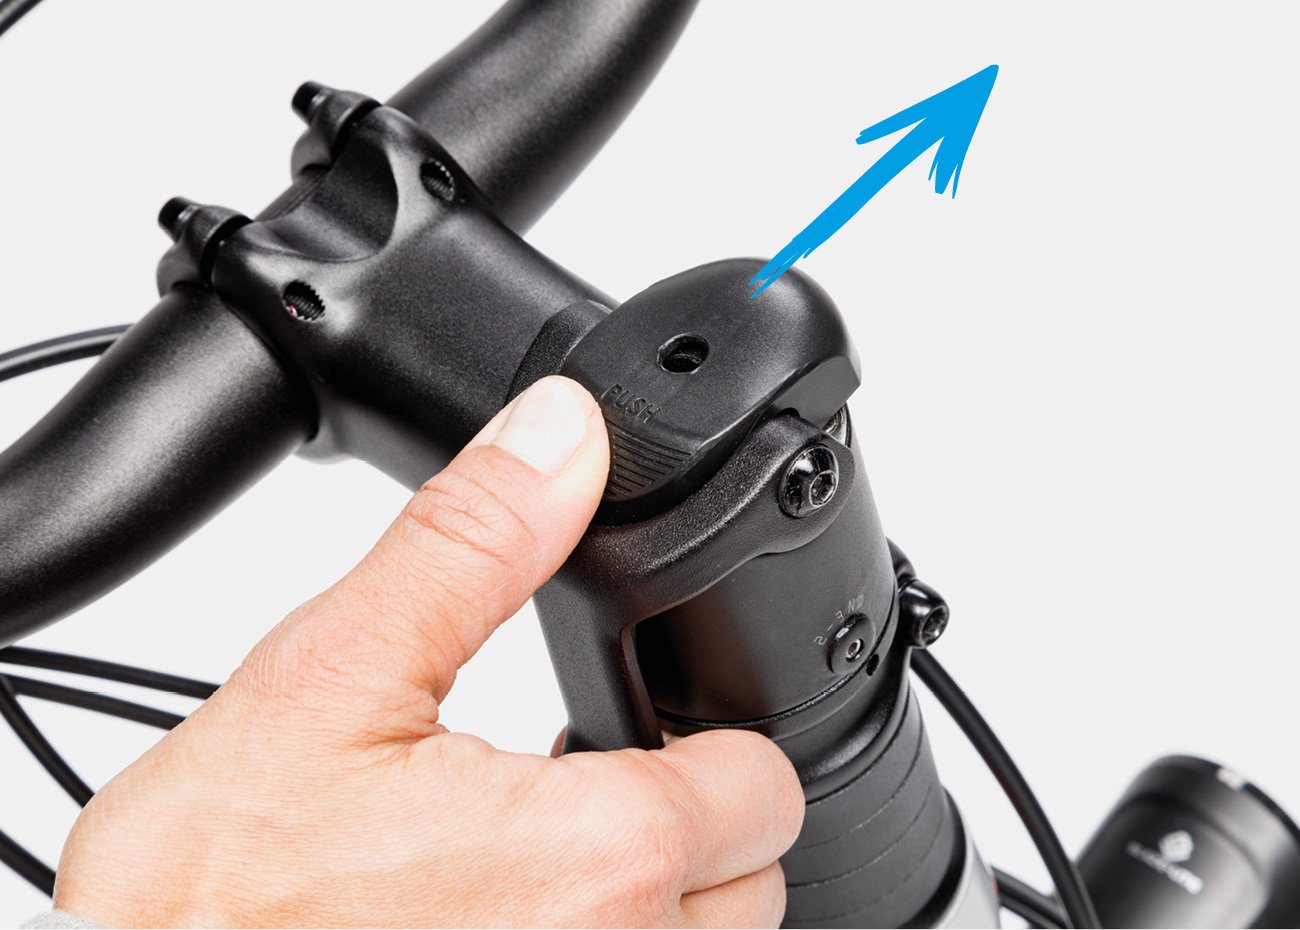
2. While holding the safety release forward, pull the stem release lever up until it stops.
3. Standing alongside the bike, put one foot against the bike box tray to help keep the box (and bike fork) stationary as you turn the handlebars.
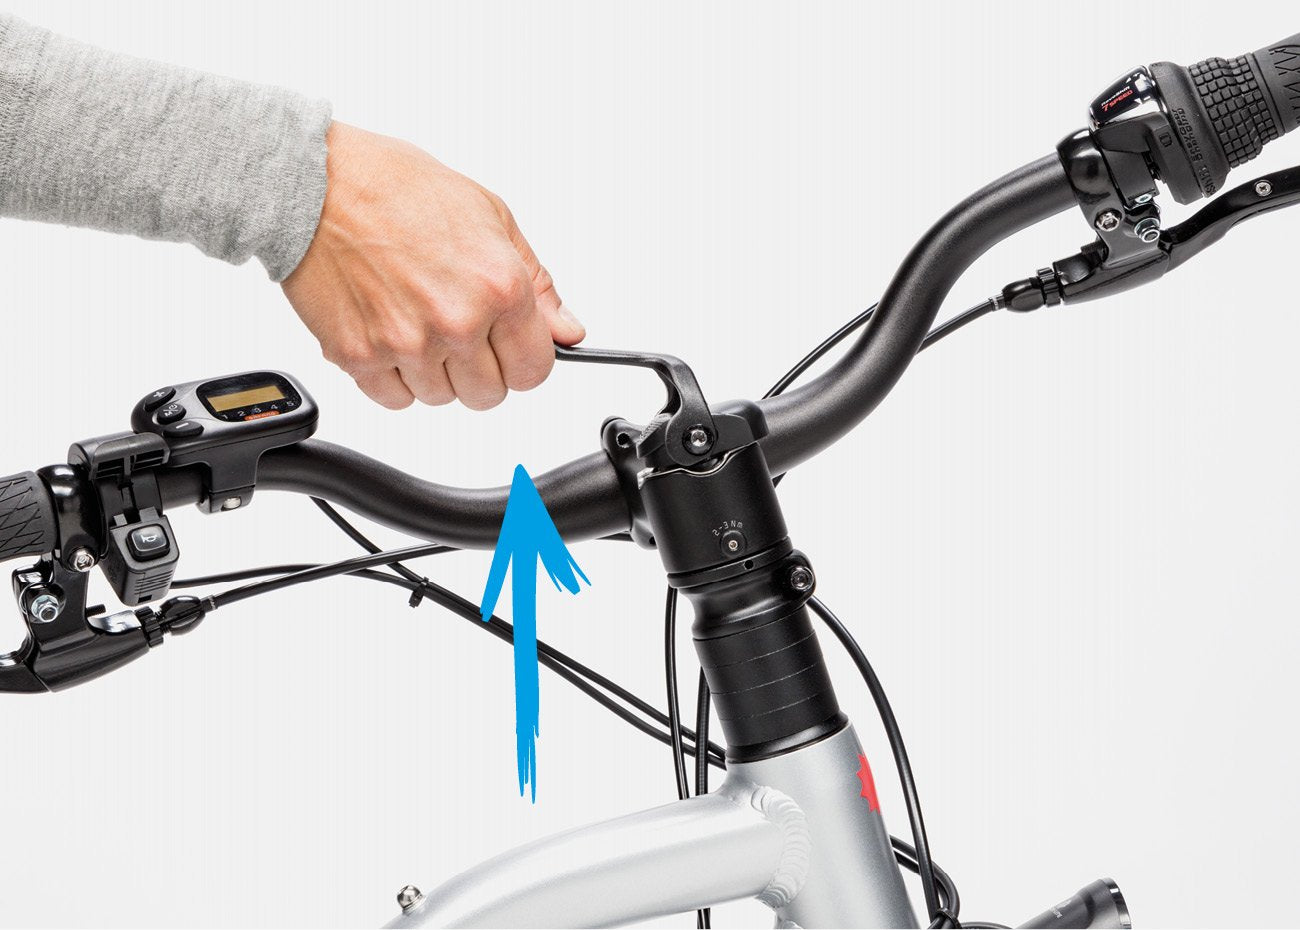
4. Rotate the handlebar 90 degrees clockwise until the handlebars are perpendicular to the bike frame.
NOTE: Make sure to keep the fork stationary—with the front light pointing forward—while turning the handlebars.
5. Push the stem release lever back down to lock the handlebars into place.

This step is particularly important to your safety. Please see the assembly video at help.chargebikes.com as well as this Quick Start Guide.
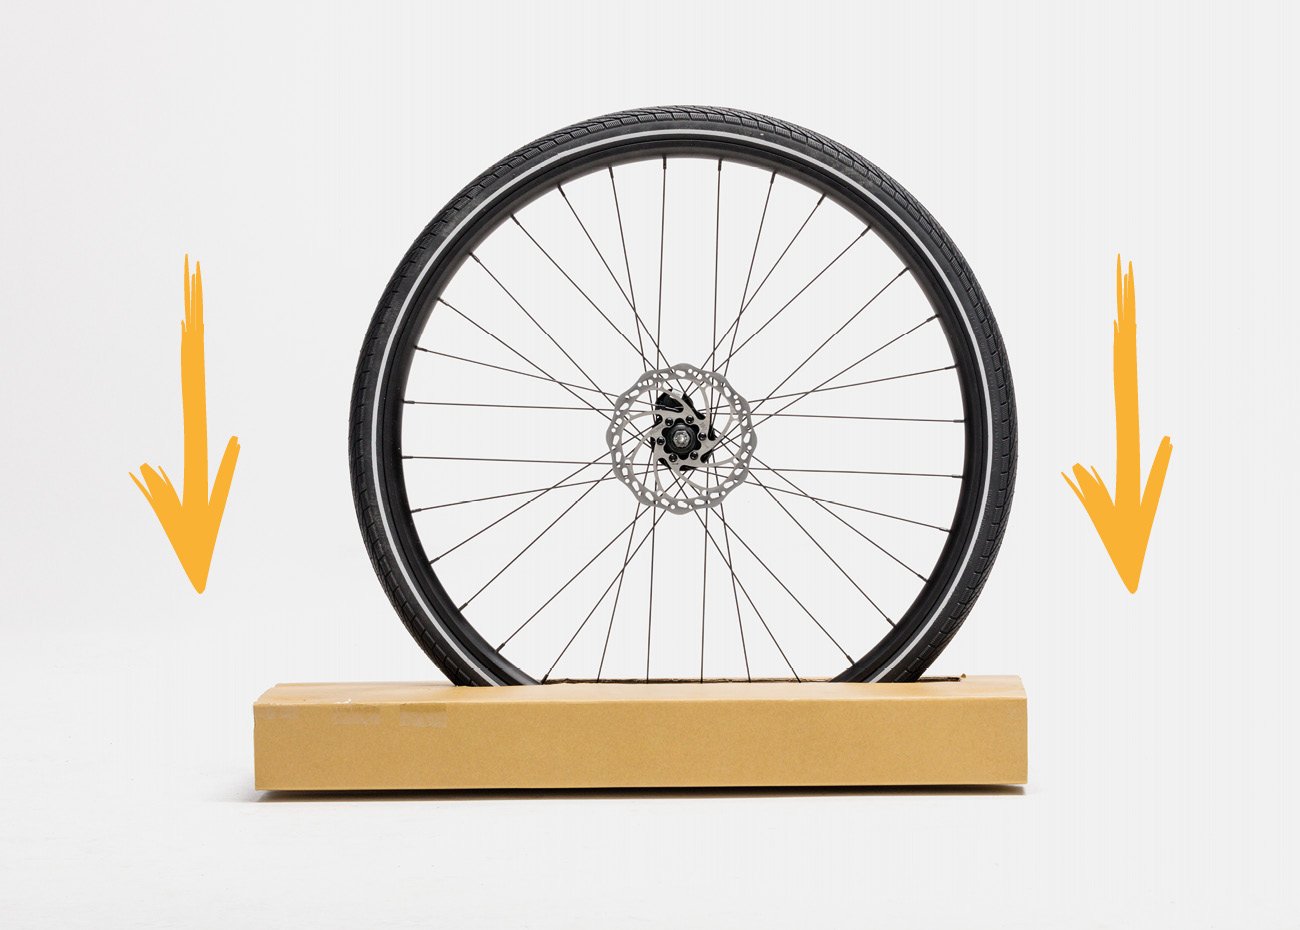
1. Lay the cardboard block that says “Temporary Wheel Stand” flat on the ground with the printed side facing up.
2. Insert the front wheel into the cutout marked “Insert Front Wheel”. Verify the disc brake rotor is on the side marked “Brake Disc This Side”.
NOTE: The front wheel should now stay upright on its own in the temporary stand.
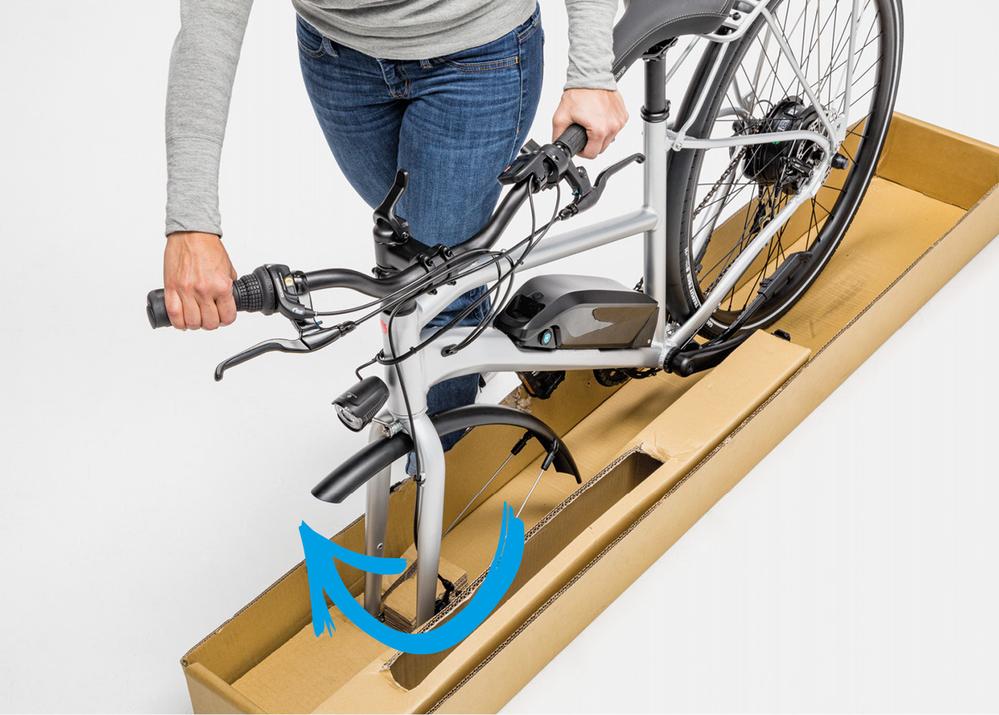
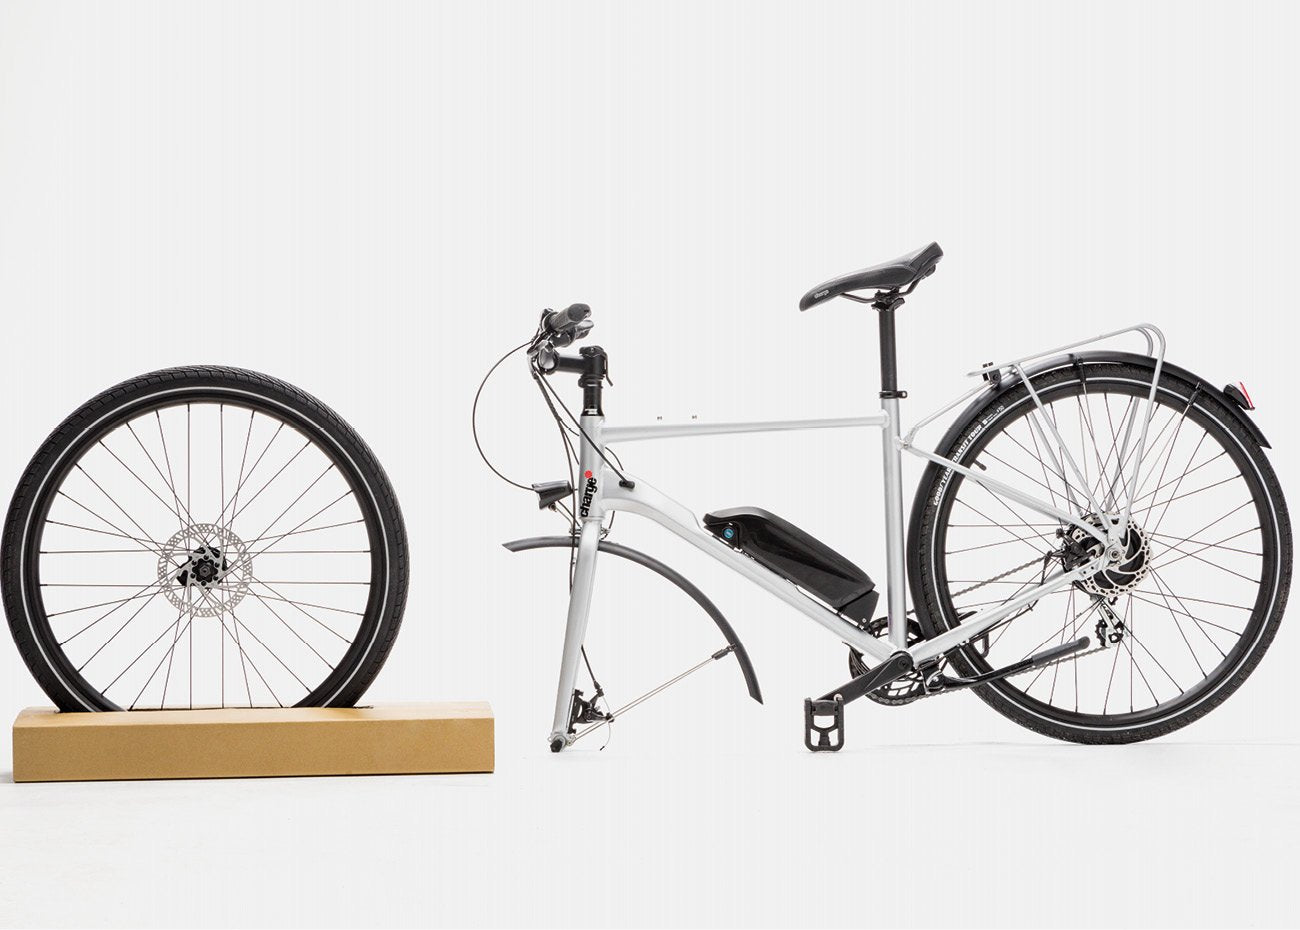
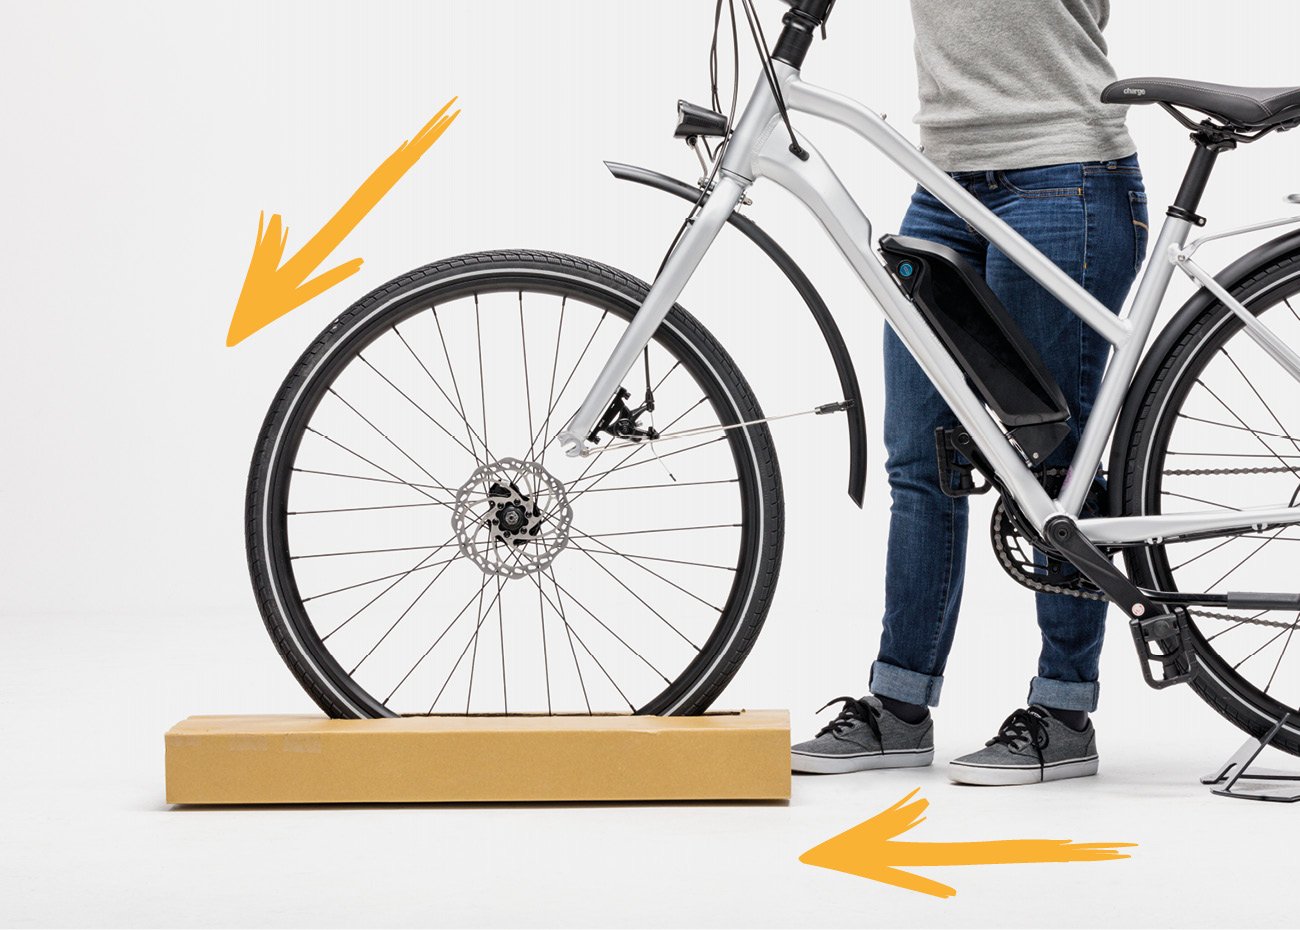
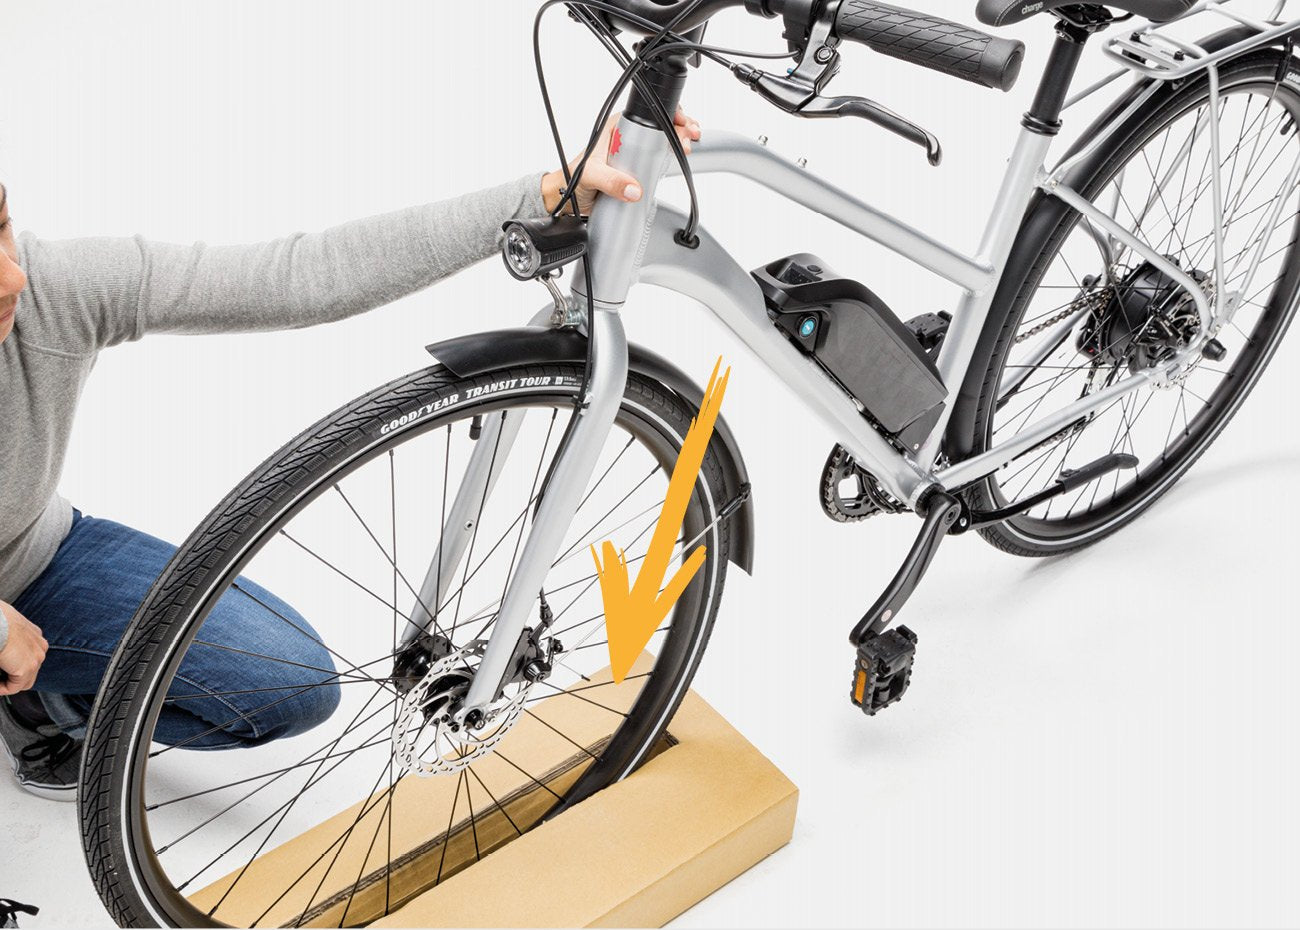
3. Lift the bike out of the tray and place with the front forks gently on the ground, making sure the bike is stable.
4. Place the front wheel and the wheel stand in front of the bike. Verify the front wheel disc brake rotor is on the same side as the
kickstand.
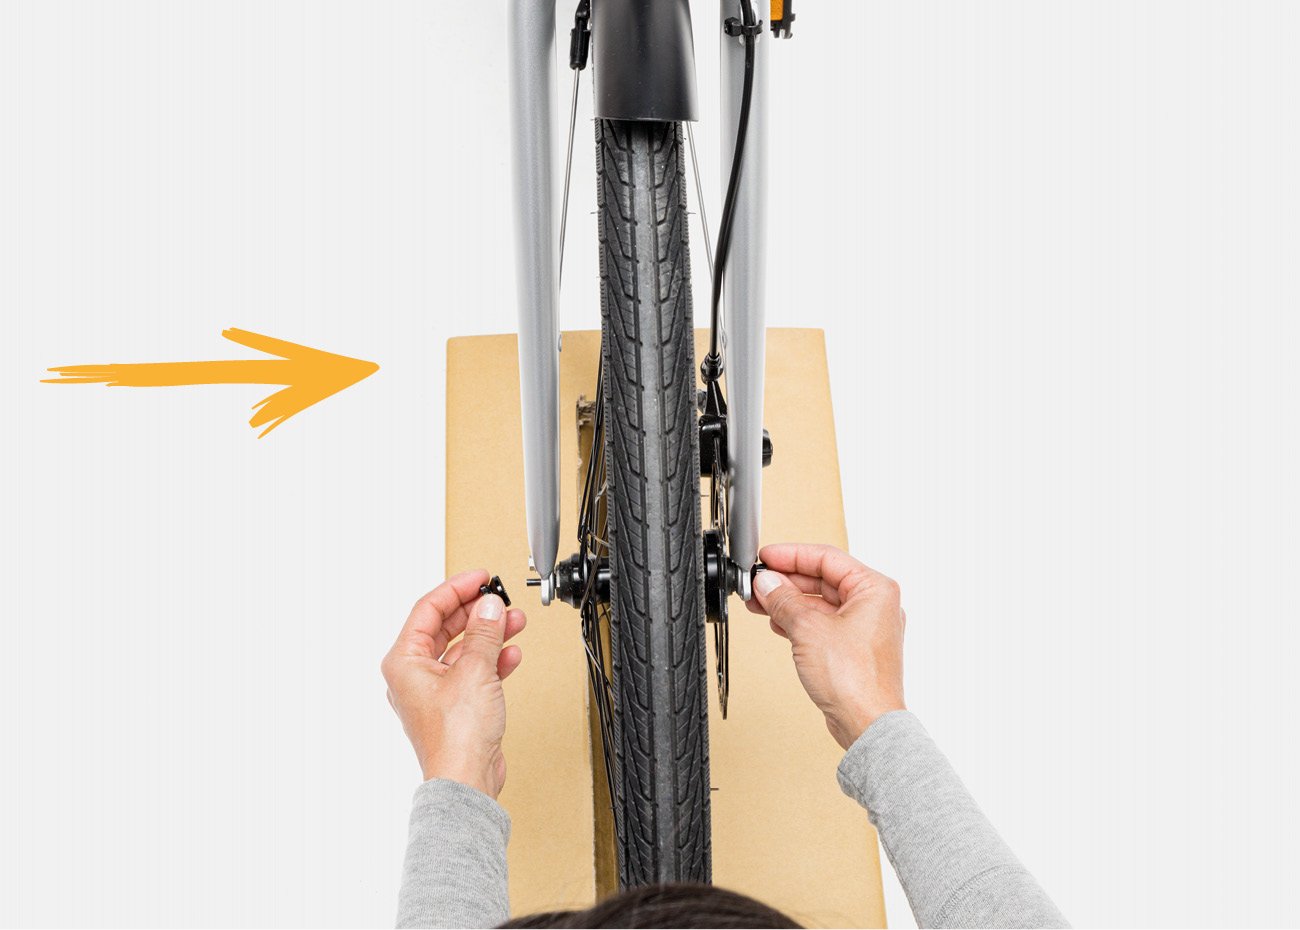
5. Locate the front fork spacer and place foot on top.
6. Holding the handlebars, lift the bike up to remove the spacer.
7. Lift the bike over to the front
wheel.
NOTE: The disc brake rotor on the wheel should be on the same side as the kickstand.
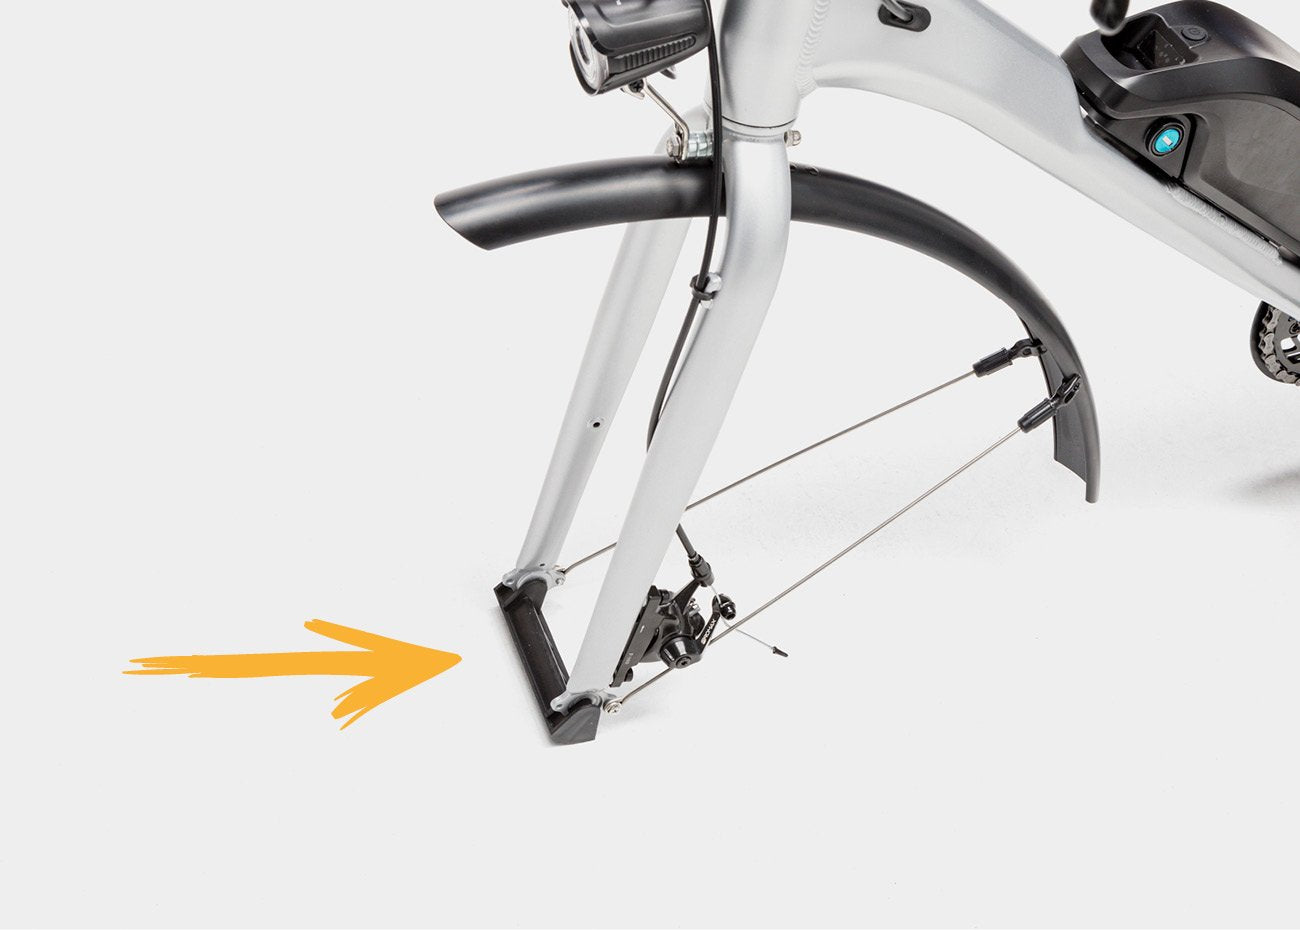
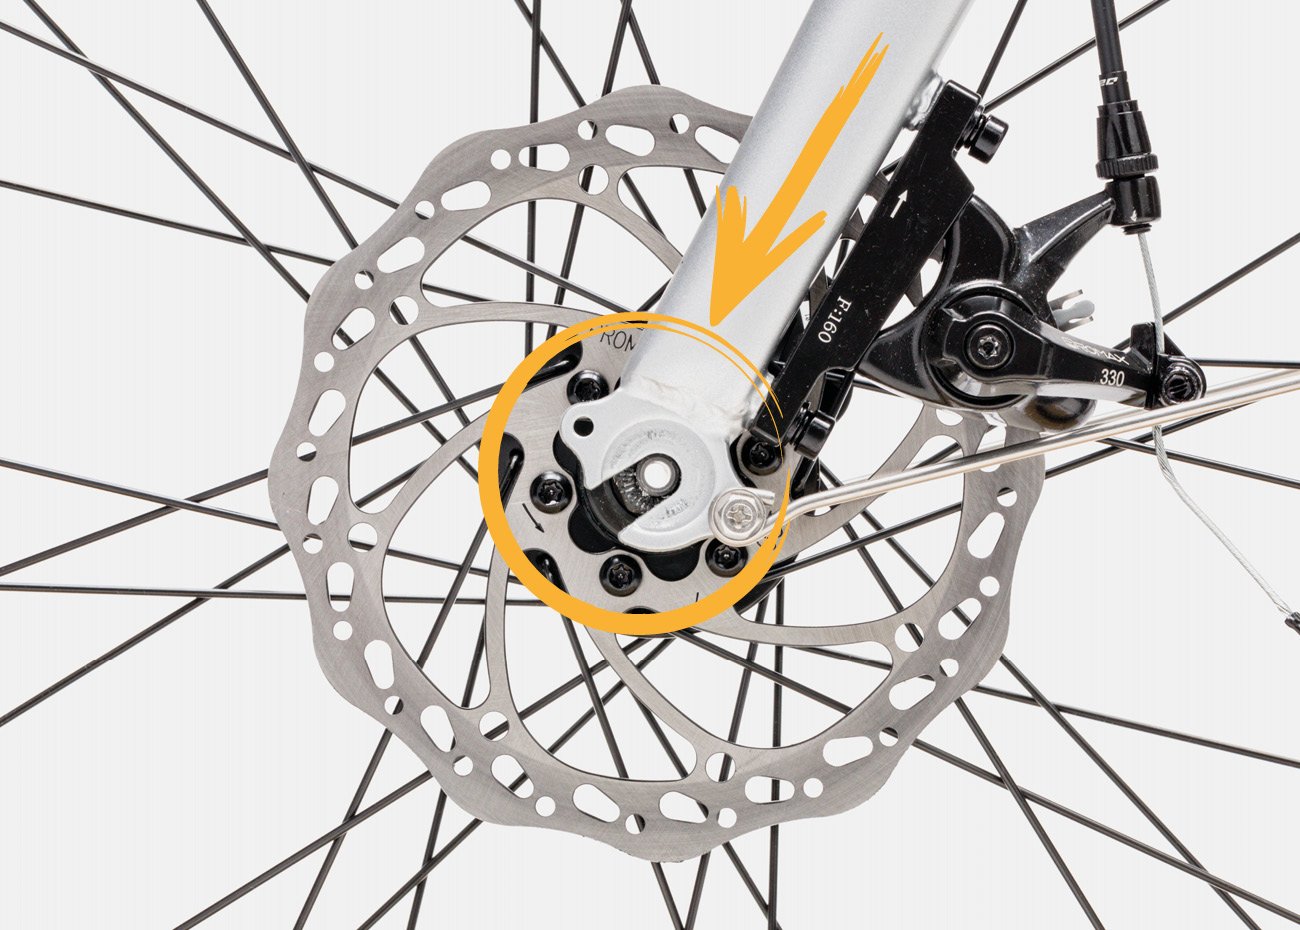
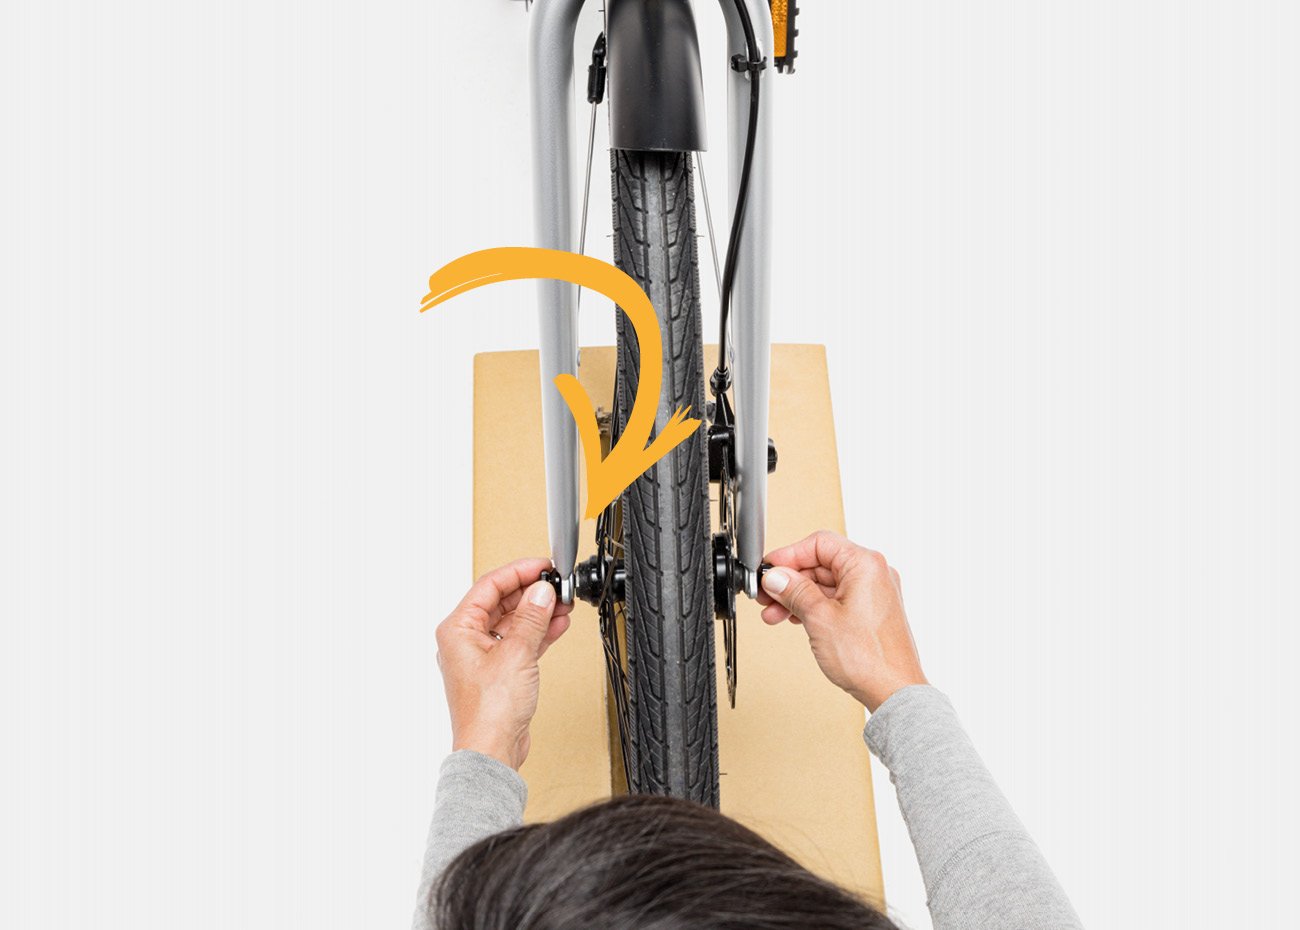
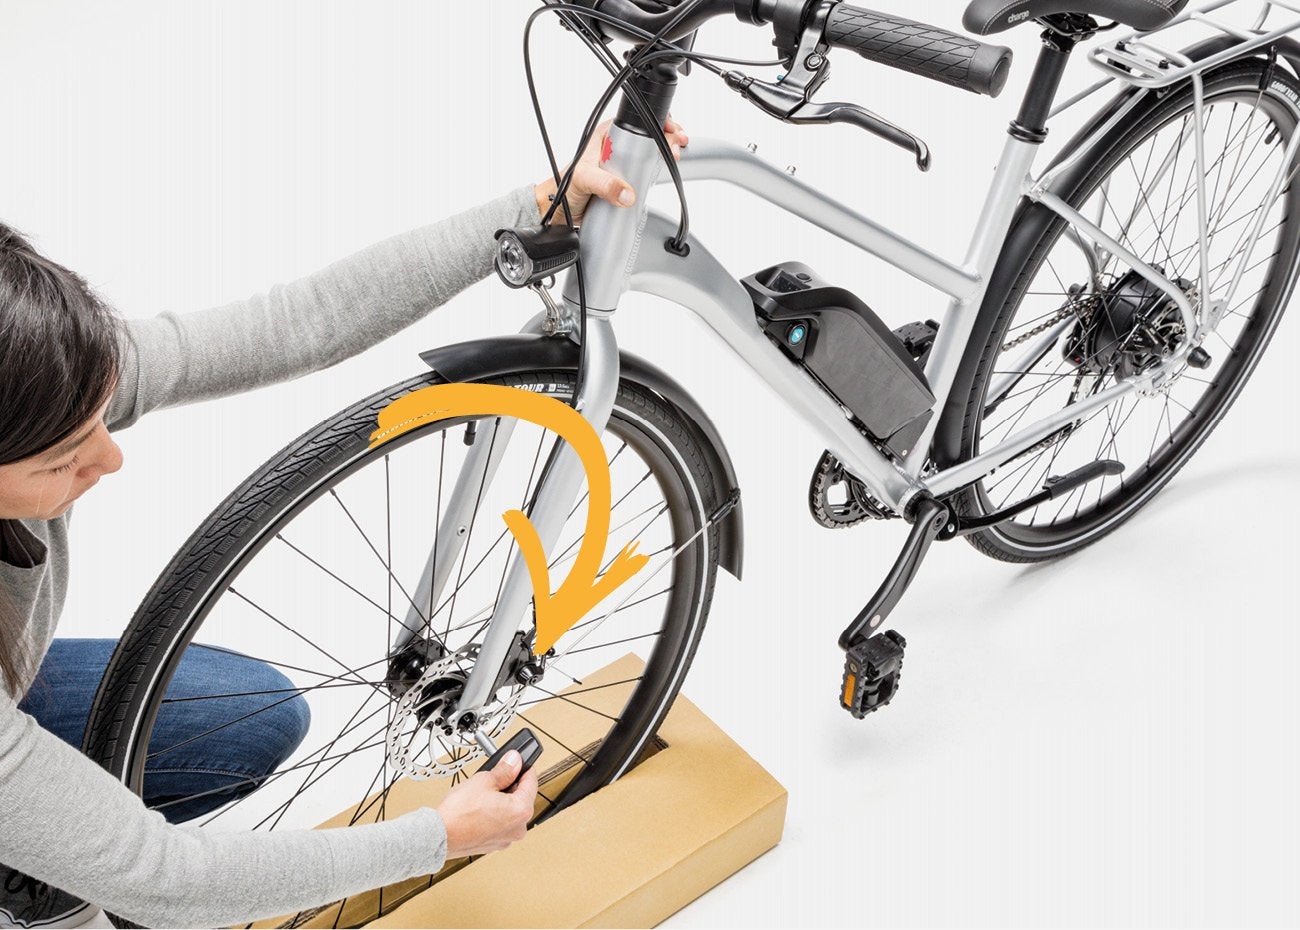
8. Lower the fork onto the front wheel until the axle is fully-engaged in the
fork end.
NOTE: While the wheel axle does not extend past the fork end, it is enough for the fork to rest securely, as pictured
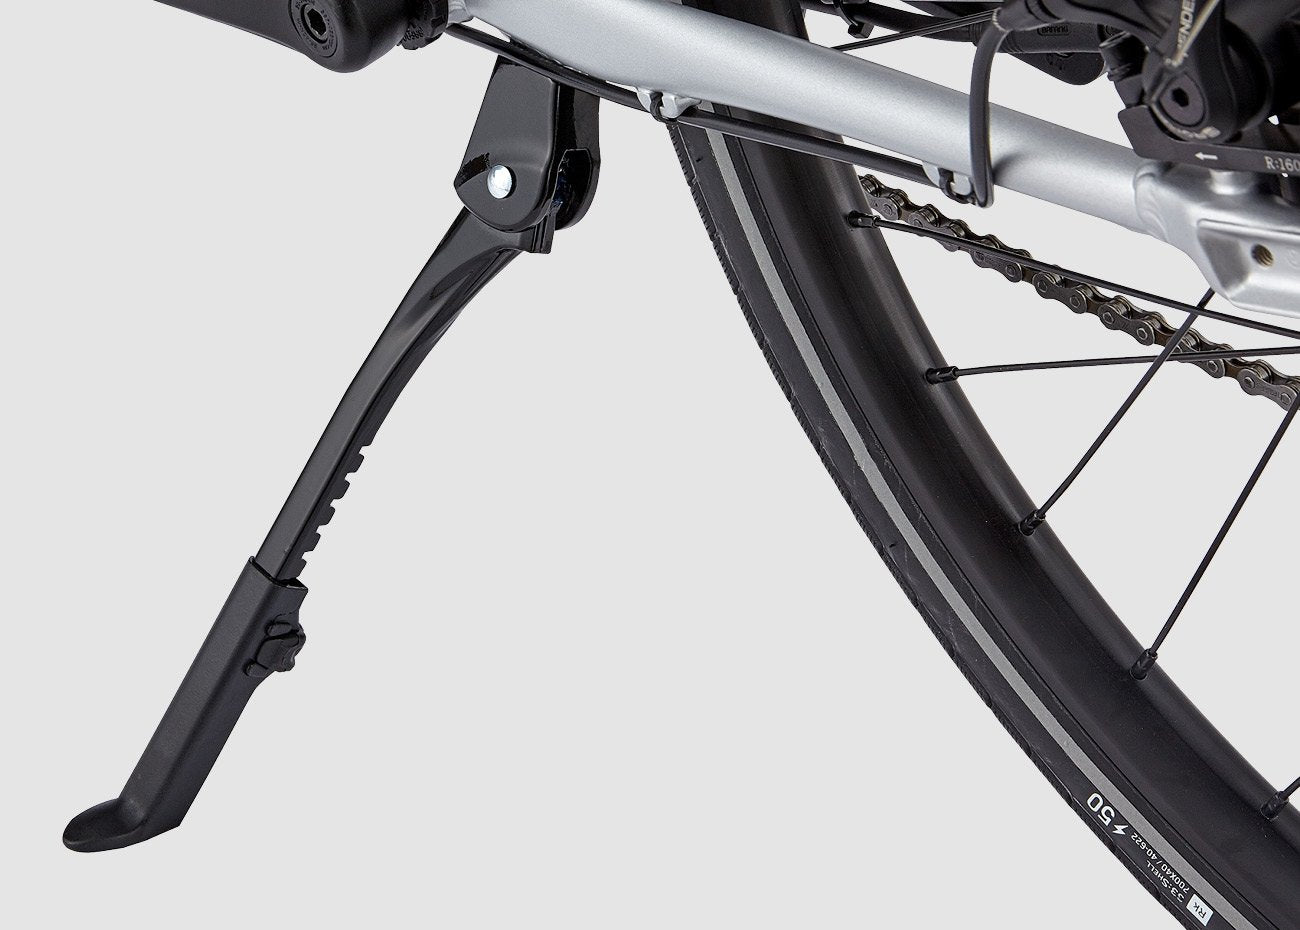
9. While holding the bike upright, put the kickstand down with your foot. The bike will now safely rest on the kickstand.
10. Locate the metal axle rod and axle nut from the parts box.
NOTE: Always screw the axle nut onto the rod with the larger end first.
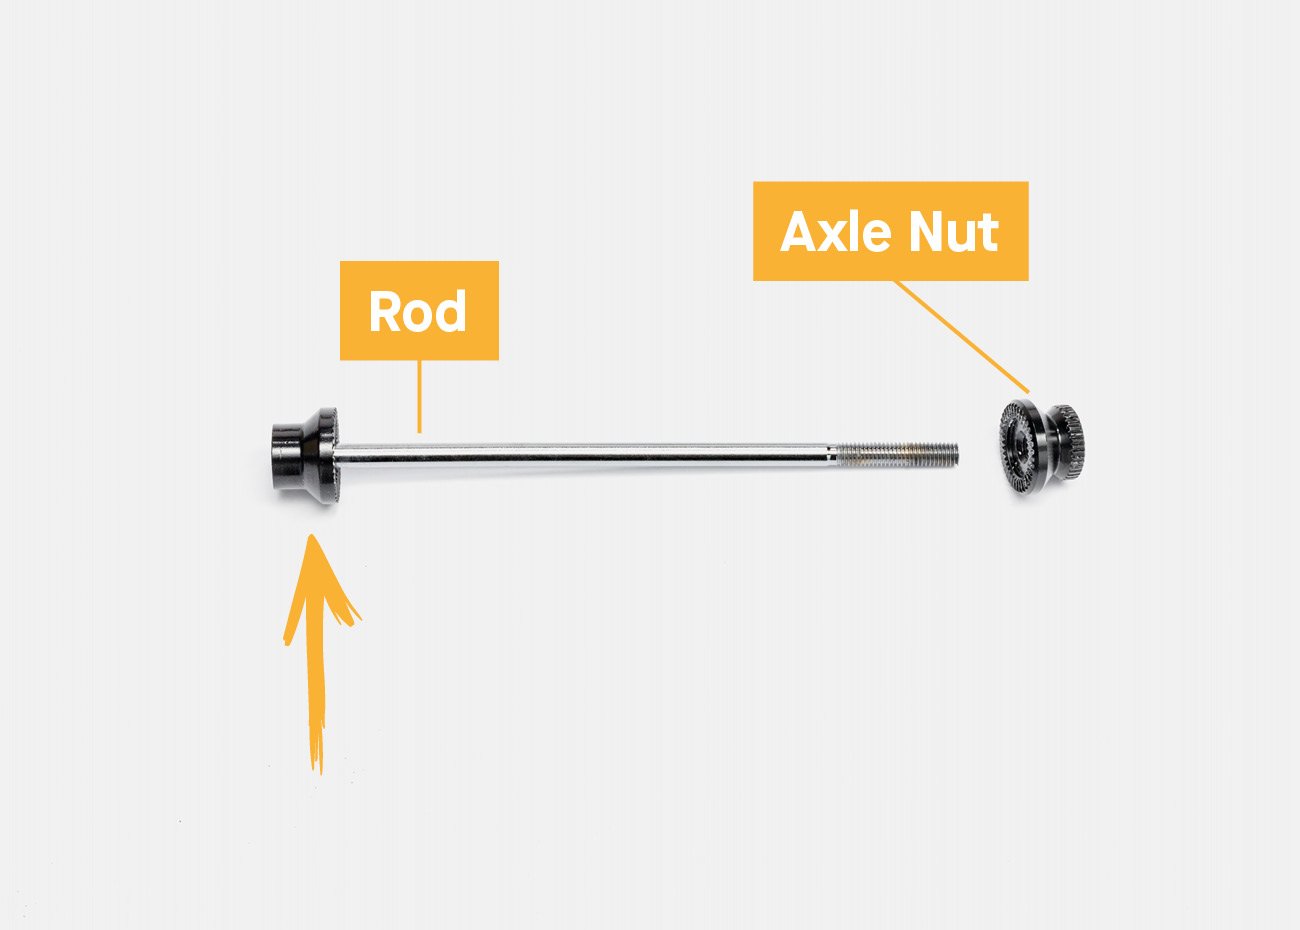
11. While facing the front of the bike (looking at the headlight), use your right hand to insert the metal rod through the axle from brake disc side.
12. With your left hand, screw the axle nut onto the axle rod, making sure the large end of the nut goes onto the rod first.
13. Turn the axle nut clockwise until finger tight.
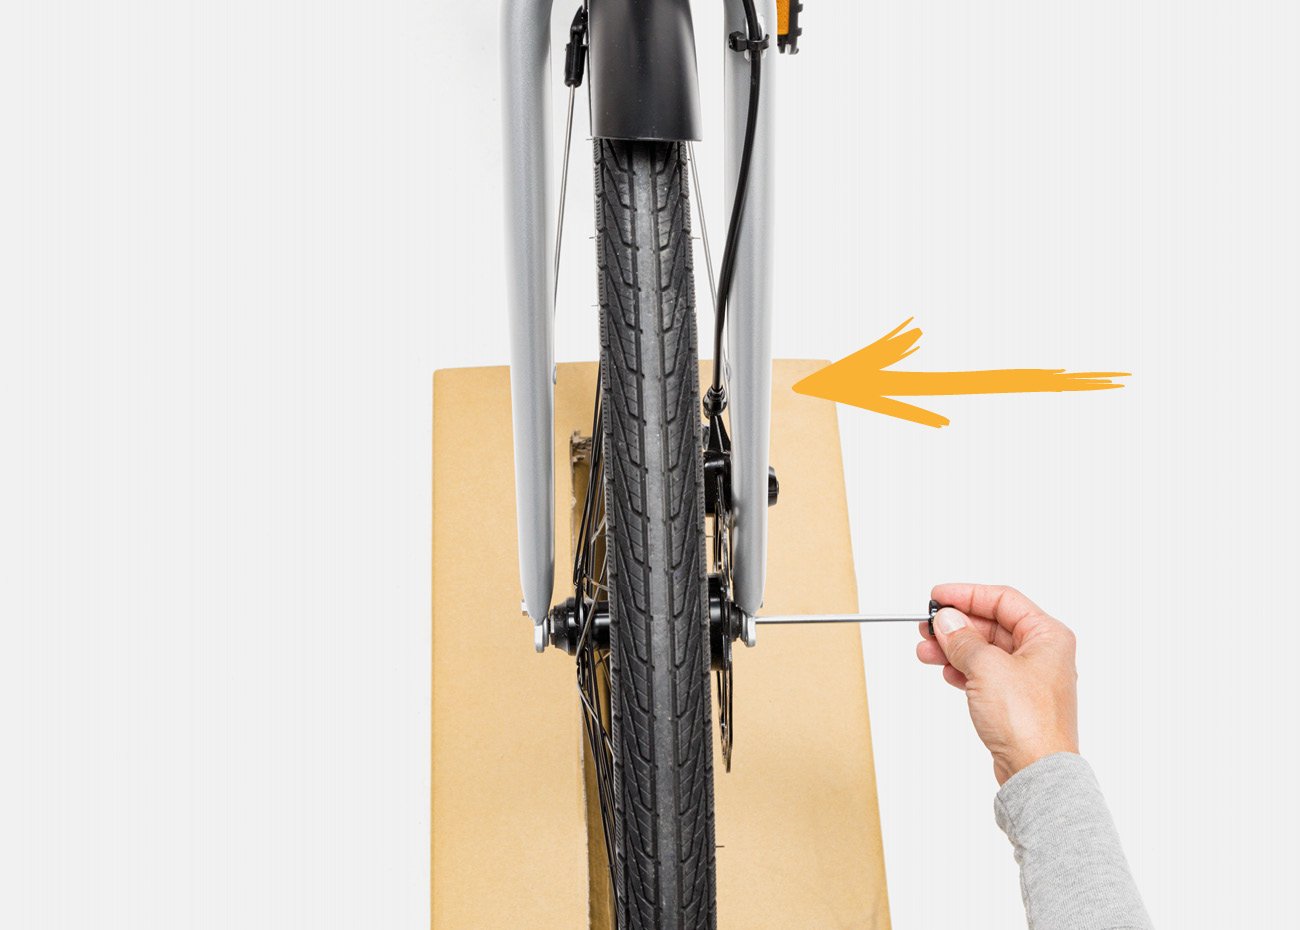
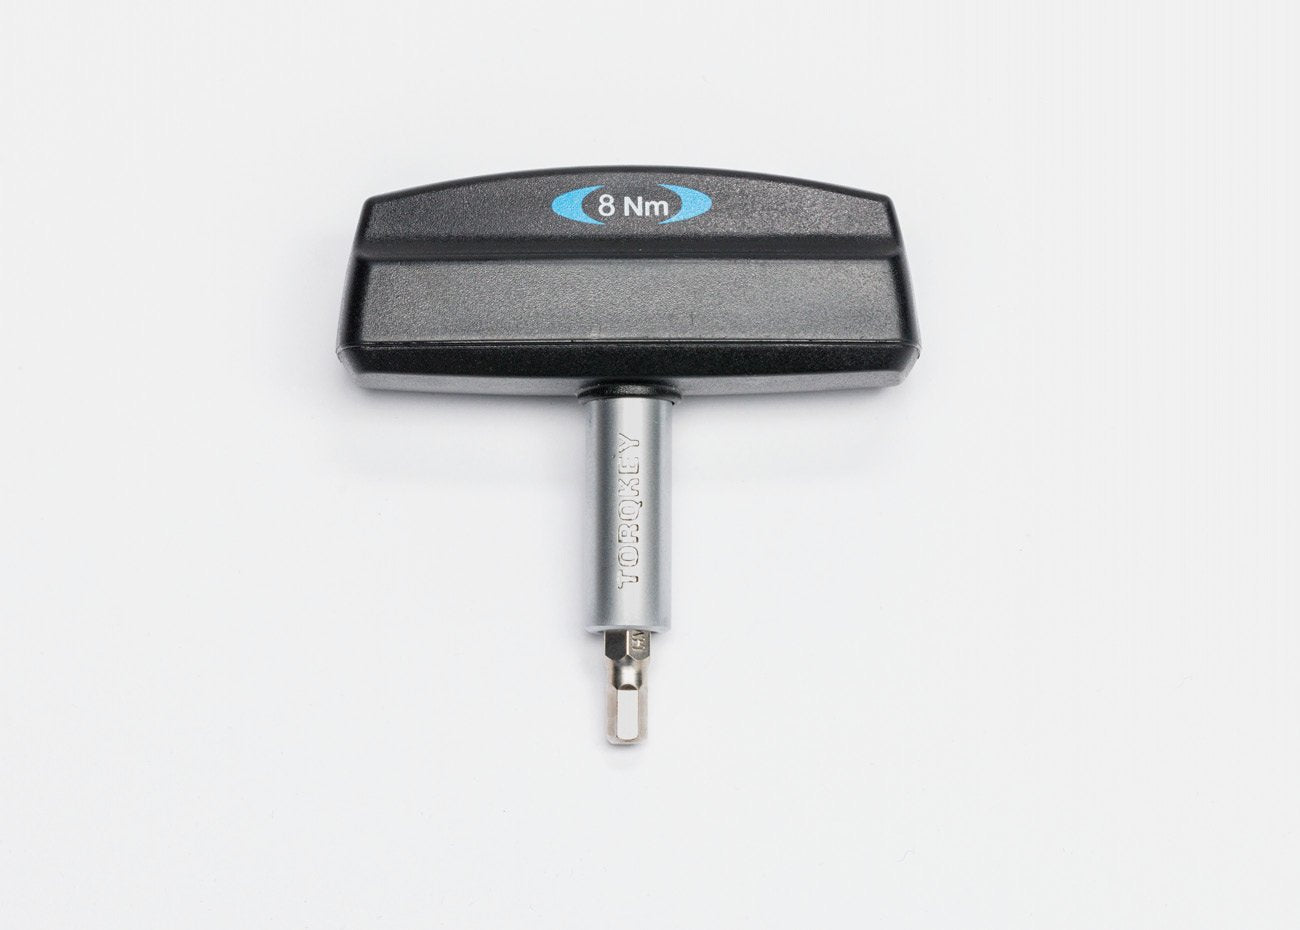
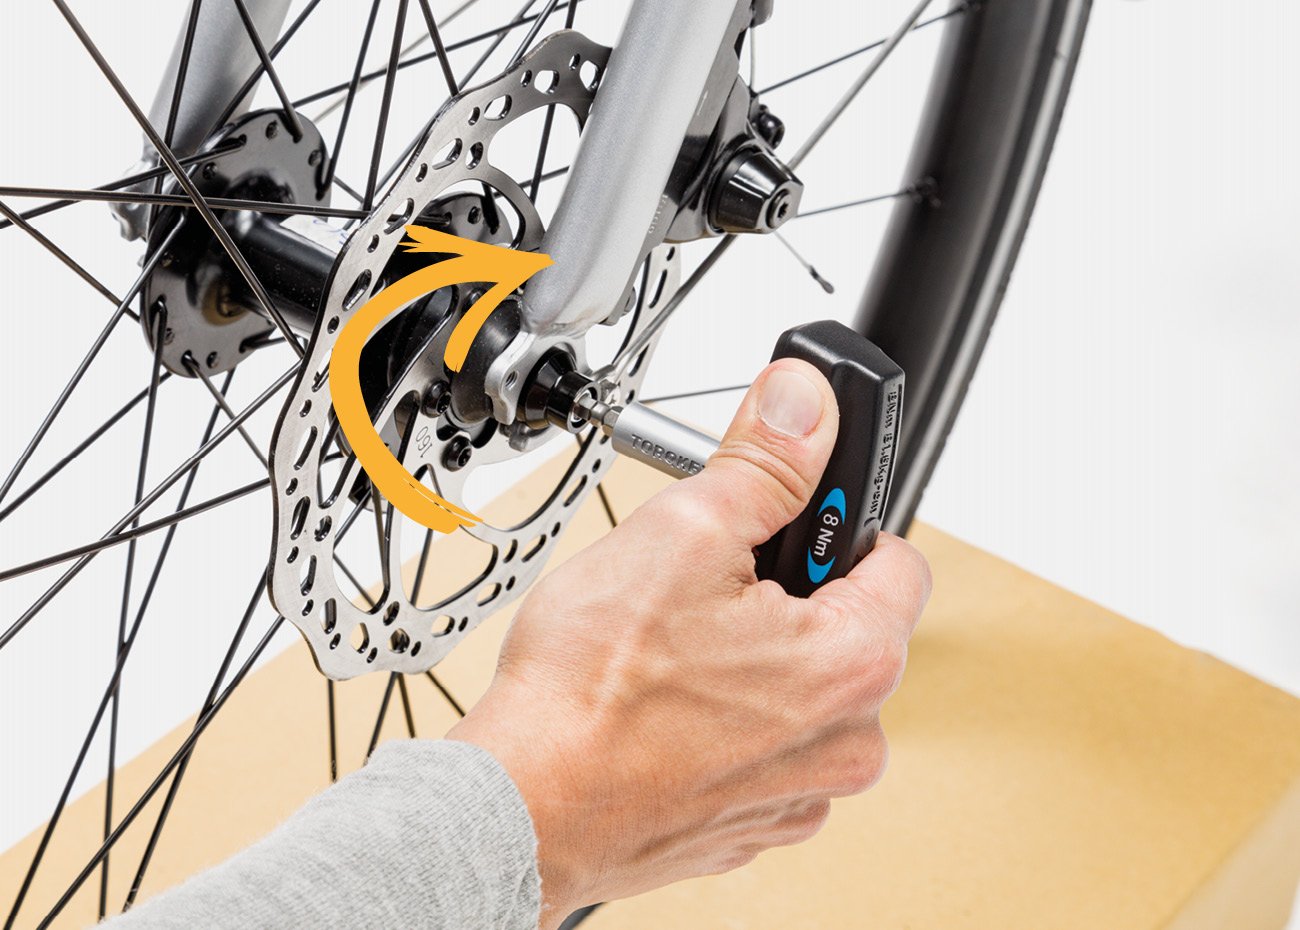
14 Locate the Torque Wrench (from the parts box).
15. With your left hand, hold the bike upright and centered (perpendicular to the floor).
16. Push the frame down to ensure the fork ends are fully seated on the axle.
17. Holding the bike upright with one hand, use your free hand to insert the Torque Wrench into the axle on the brake disc side.
18. Turn the Torque Wrench clockwise until you hear and feel a click. This indicates the correct torque has been achieved.
NOTE: You may need to apply a good deal of pressure to hear and feel the click.
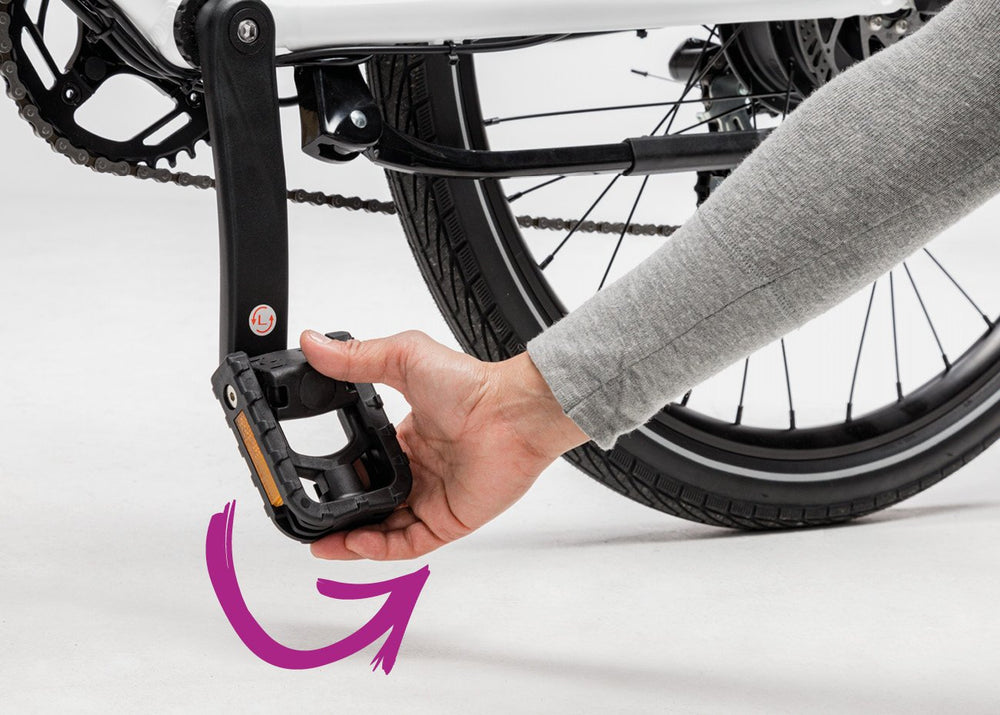
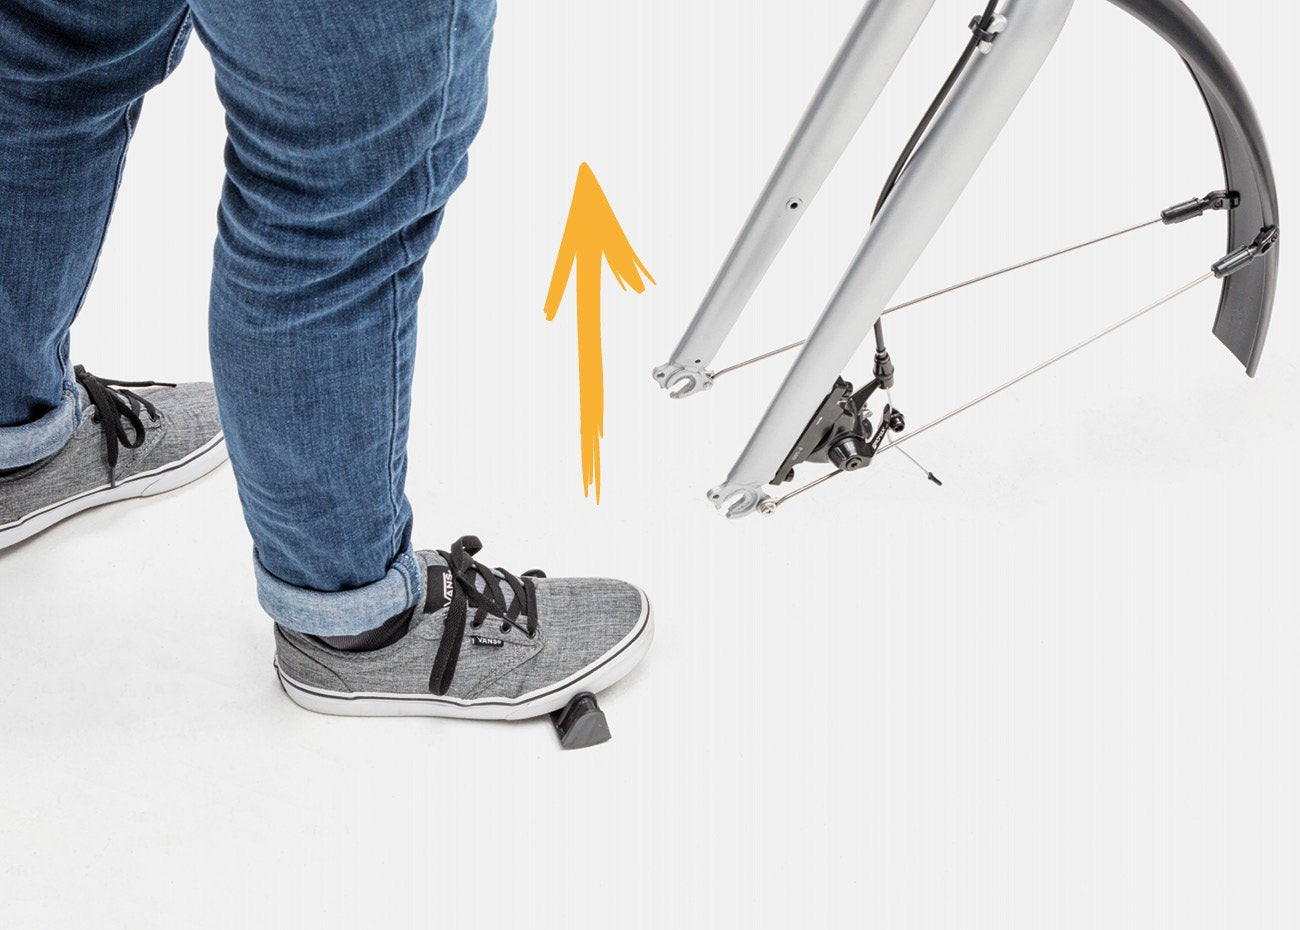
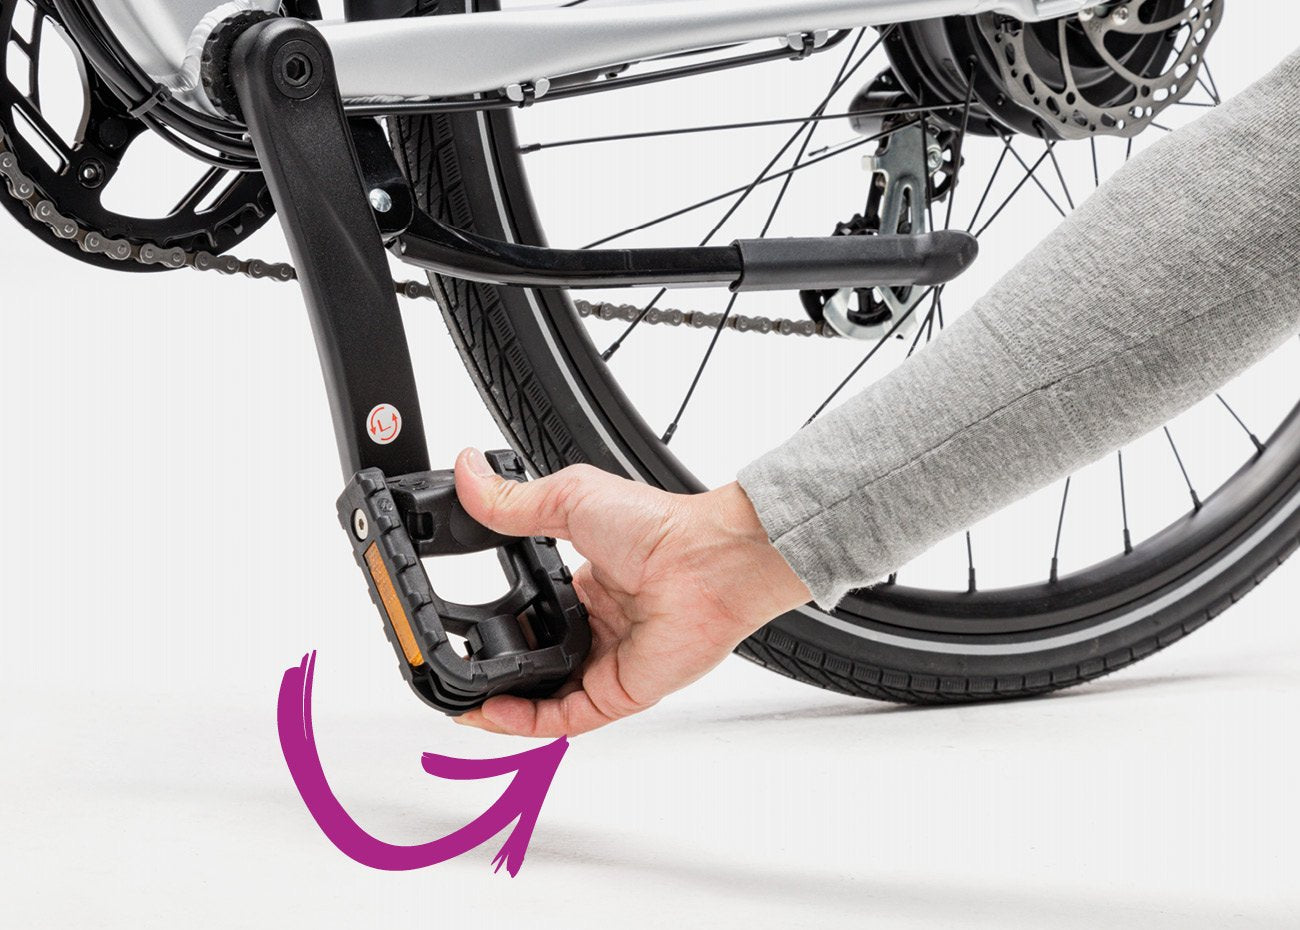
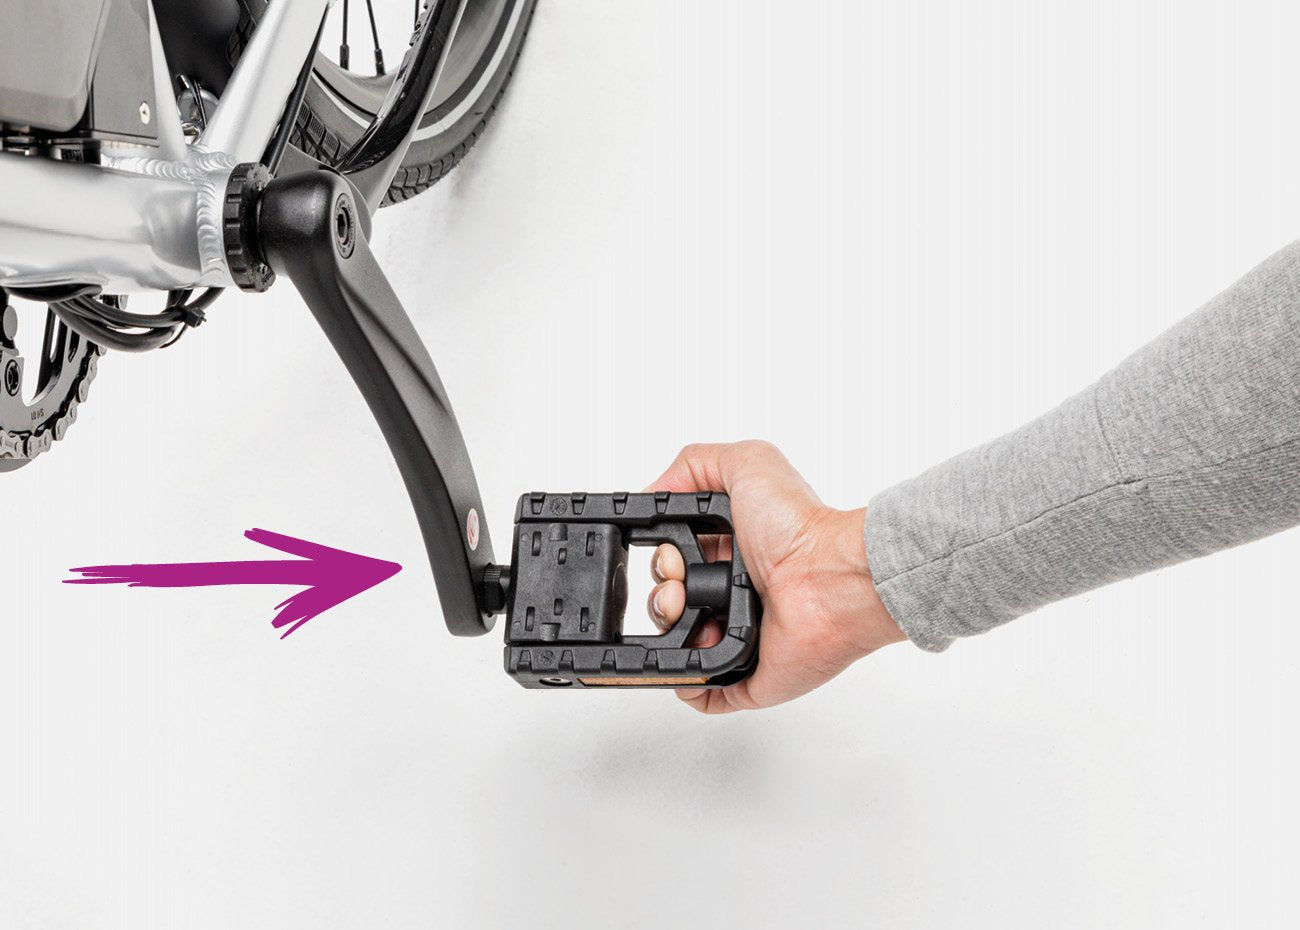
1. Flip each pedal down (or up) until it clicks
NOTE: You can always flip up the pedals by pulling on the lever with your fingers as you move the pedal to the upright position.
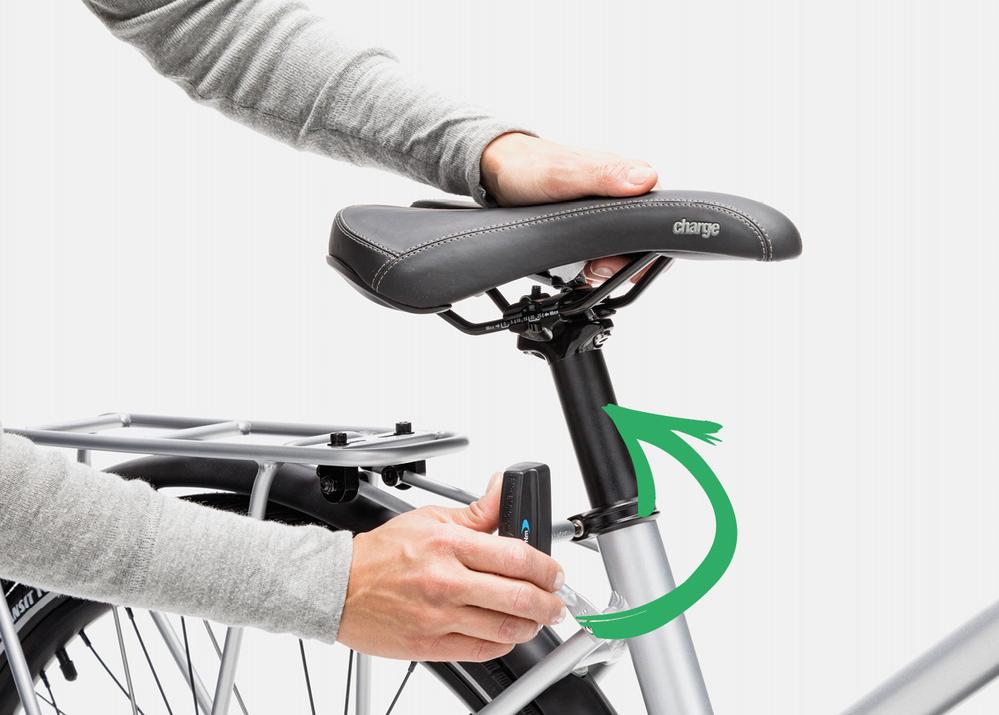
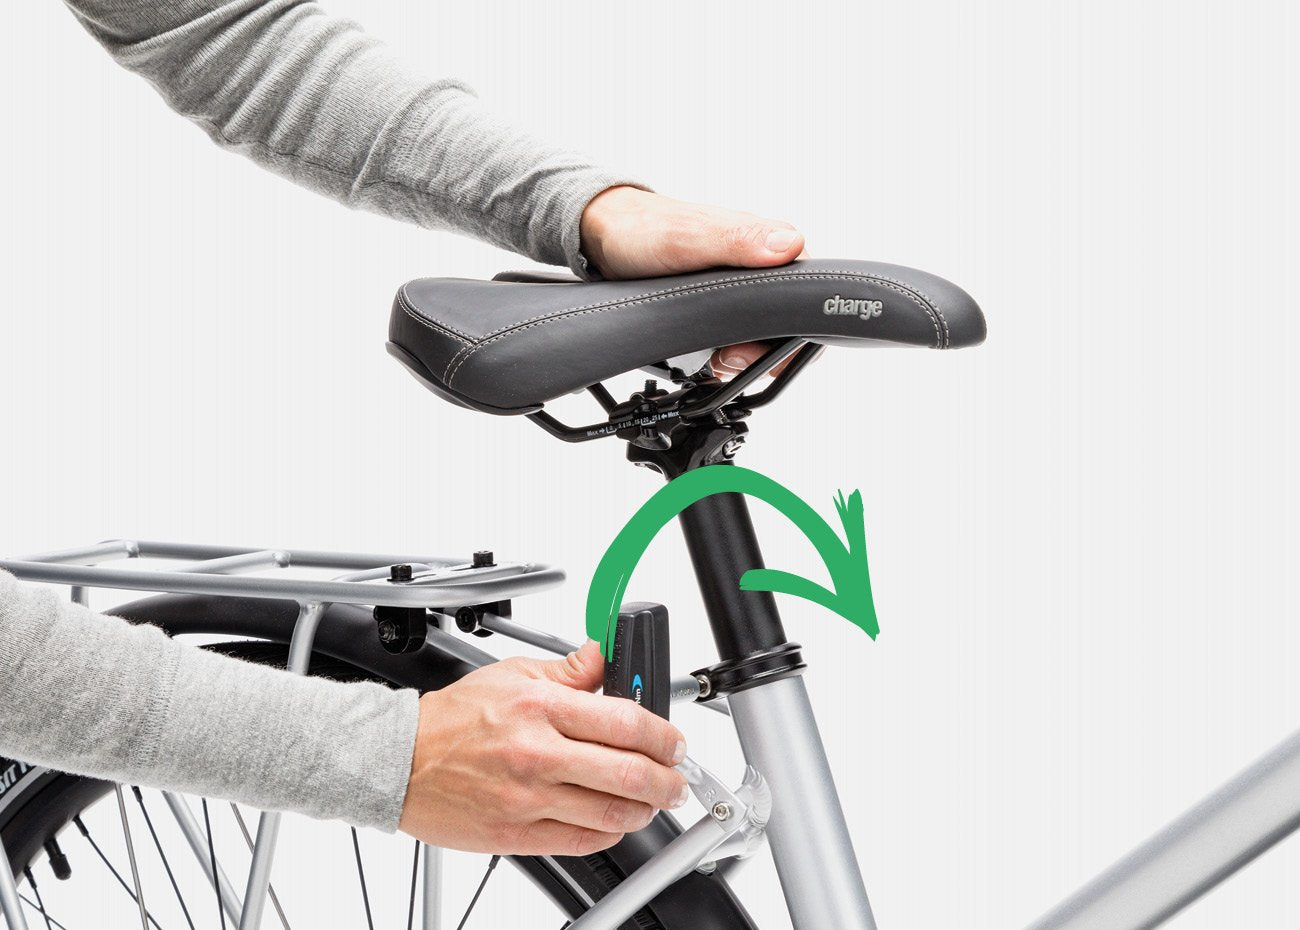
1. Using the Torque Wrench, loosen the seat post clamp bolt (turning counterclockwise) until the seat post can move.
NOTE: You do not need to remove the bolt from the clamp.
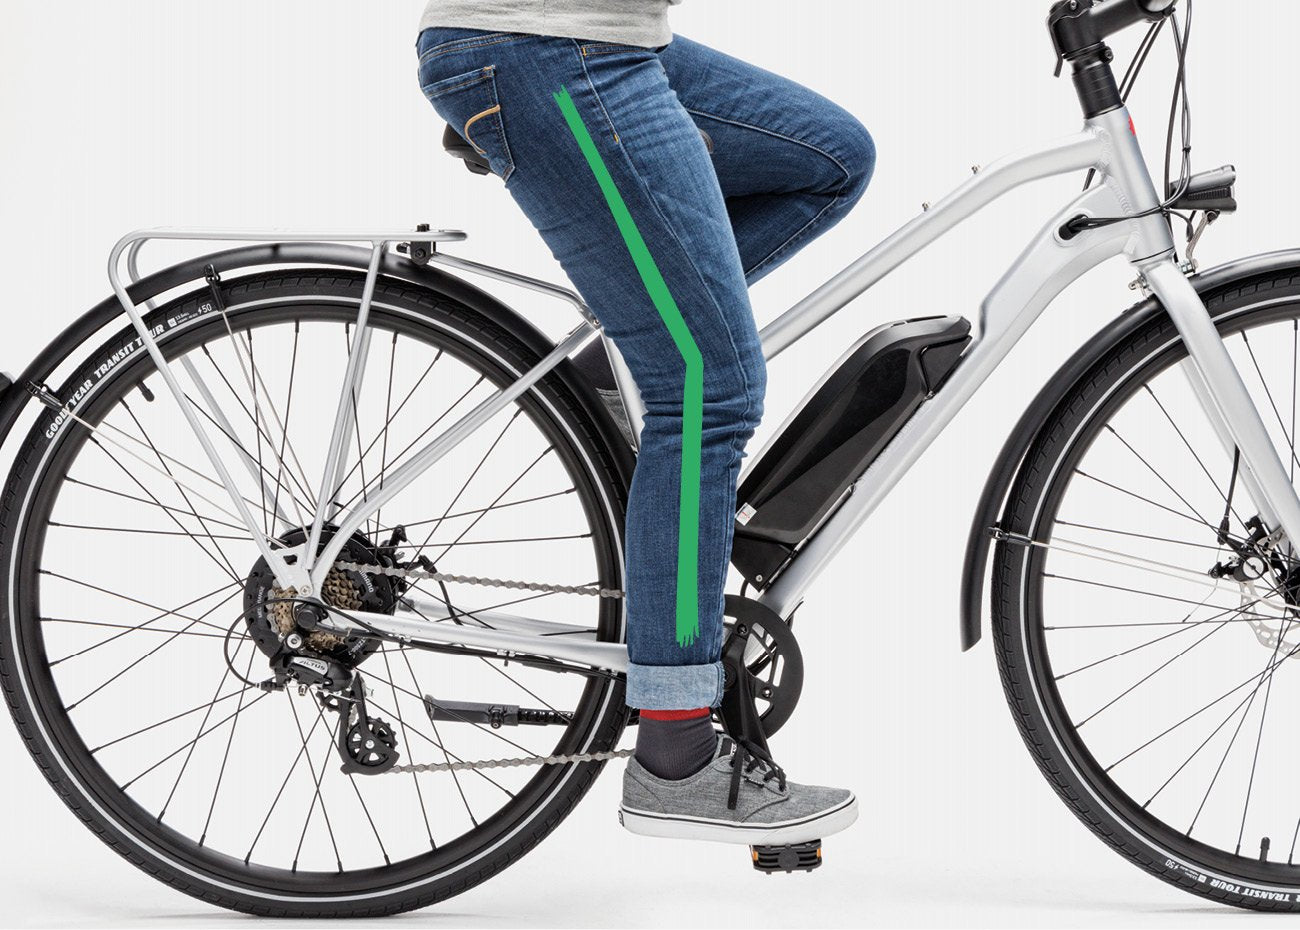
2. Slide the seat to your desired position. See Diagram A for guidance on finding the right seat height.
WARNING: Do not raise the seat above minimum insertion line marked on the seat post.
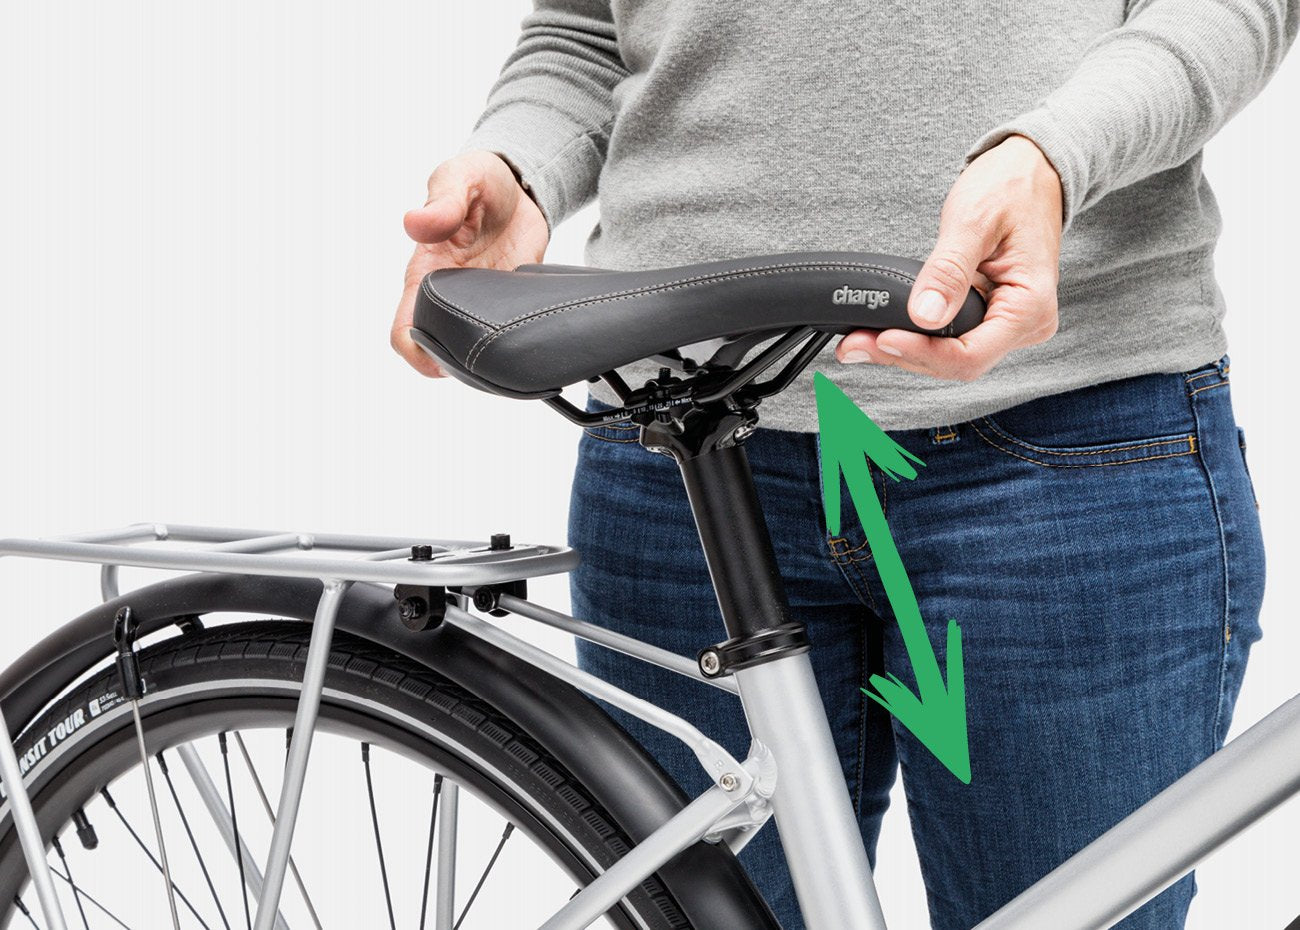
Diagram A – Find the right seat height
To find a comfortable seat height: While sitting on the bike, move one of the pedals to the 6 o’clock position, place your heel on the pedal. Adjust the seat higher or lower until your knee is just slightly bent without having to shift around on the seat.
NOTE: Do not leave kickstand down when sitting on the bike. The kickstand is not designed to hold up the weight of a rider.
3. Ensure the seat nose is in-line with the bike frame.
4. Secure the seat by turning the bolt clockwise until you hear and feel the Torque Wrench click.
Charge Bikes feature a valve cap sensor, so you always know when it’s time to add air. The sensors are included in your parts box. Simply screw the sensors onto the valve stems to quickly verify air pressure.
Green is good to go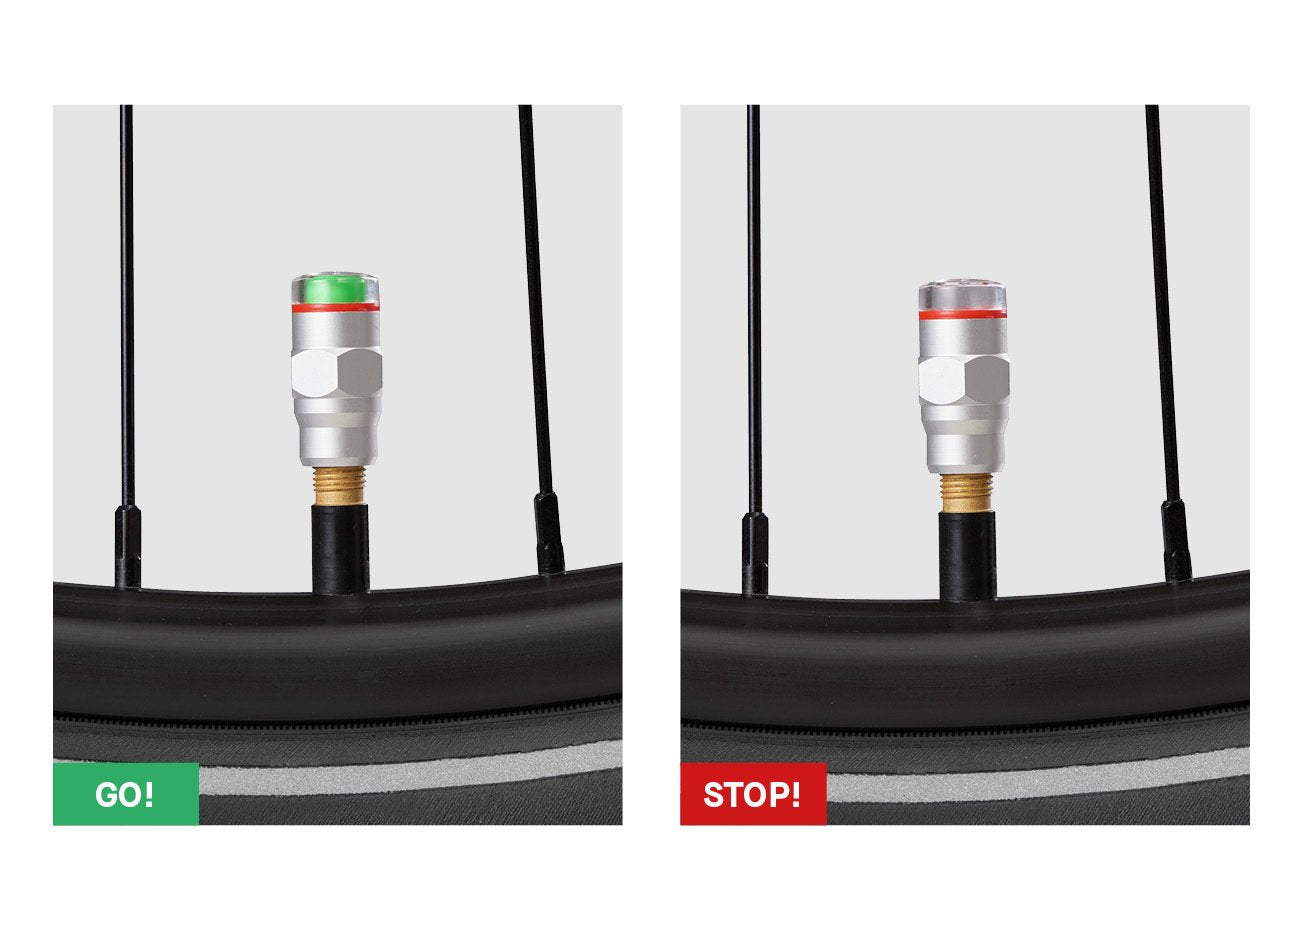
Your new Charge Bike is now assembled.
Before going for your first ride, review the Assembly Checklist and the Pre-Ride Checklist in your Charge Bicycle Owner’s Manual